Surface Roughness/Finish
Filter by Process Zone:
Surface Roughness Testing Equipment

The SR160 Surface Roughness Tester from Starrett is tough, shock tested, and capable of withstanding the demands of a shop environment.
Measuring Surface Finish

Here are some of the latest advances in surface measurement work that show the newest capabilities and innovations in metrology for the shop floor.
Prerequisites for High Surface Quality

The flawless surfaces required in mold making demand large cutting volumes during the roughing sequence, but a perfectly finished surface at the end. This analysis from Heidenhain examines how, along with high quality machine tool mechanics and control performance, the optimal milling result necessary to do this depends heavily on the measuring technology.
Probe Option Allows for Fully-Integrated Inspection
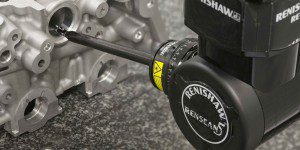
Renishaw’s SFP1 probe is a fully integrated option for the REVO 5-axis measurement system.
Surface Roughness/Finish
This category includes systems used to inspect the surface integrity of a workpiece after it has been processed by any surface modification process, including forming, metal cutting, welding, surface treatment, or other surface alteration. In the fabrication process, a surface’s…
Integrated 3D Part Measurement and Inspection Reporting
InspectionXpert and Verisurf have integrated the strengths of 3D measurement with automated inspection reporting by streamlining the first article and production inspection process from 2D drawings to automated 3D measurement and reporting.
Mahr Federal Expands Application Center
The double-sized center includes broader range of metrology equipment to enhance application development and customer interaction.
Mahr Federal Engineer Recognized by ASME
Frederick G. Parsons was honored by the American Society of Mechanical Engineers with the Patrick Higgins Medal for outstanding service.
USB INPUT TOOL CONNECTS HAND MEASUREMENT INSTRUMENTS TO PC
Transfer data values from calipers, micrometers, indicators, depth gages, height gages, bore gages, surface roughness testers, and laser scan into a PC using the new USB Input Tool Direct: USB-ITN® from Mitutoyo America.
REDUCE COSTS BY MEASURING BOTH FORM AND SURFACE ON SAME MACHINE
The MarForm MMQ 400-2 from Mahr Federal can evaluate roundness, sector roundness, run-out, sector run-out, concentricity and coaxiality, total run-out, cylindricity, straightness, section-by-section straightness, parallelism, perpendicularity, angularity, flatness, conicity, and taper on injection components, ABS components, valves, pistons and piston rods, brake disks, gear shafts and ball-bearings.
LASER-BASED SURFACE MEASUREMENT AT THE MACHINE TOOL
Lasercheck surface roughness measurement gages from Schmitt Industries use patented laser light scatter technology to measure the Ra of materials smoother than one microinch in a fraction of a second directly from the machining floor.


