Measurement & Inspection
Filter by Process Zone:
Paul Jr. to Appear in FARO Booth at Quality Expo
FARO Technologies, Inc. (Lake Mary, FL), a leading provider of portable measurement and imaging solutions has announced that Paul Teutul Jr. (“Paul Jr.”), owner of Paul Jr. Designs and star of the Discovery Channel’s American Chopper: Senior vs. Junior, will…
SURPASSING TRIAL AND ERROR: ACCELERATING THE INSPECTION OF TUBE AND PIPE DIMENSIONS
Rare Breed: Tube and pipe bending shops must rethink their processes to improve accuracies and meet tighter tolerances at lower costs. Cathy Hayat of Hexagon Metrology explains how measurement technology designed specifically for these applications will not only increase their productivity and precision, but also dramatically reduce their scrap rates and lower their costs.
TOUGH TIMES: THE IMPERATIVE FOR PROCESS CONTROL
Mike Riley presents a simple model from industrial metrology supplier Renishaw Inc. that explains the sources of process non-conformance and the process control methods to address them – something manufacturers will need if and when times get tough.
Balluff RFID Embraces the Cloud
One of the biggest advantages of using Radio Frequency Identification (RFID) in industry and logistics today is the visibility it can provide into the process. With the use of cloud computing, that visibility can be achieved with greater flexibility and lower cost.
THE TIP OF THE SPEAR: HOW TO CHOOSE AND USE STYLI
When collecting measurement data with a probe, the selection and use of the stylus becomes critically important because of the proliferation of probes in manufacturing – on machine tools, CMMs, portable arms – and the many different types of probes available, such as kinematic, strain gauge, scanning, etc. Dennis Bobo of Renishaw reviews the core points that you need to know before making that investment.
New Class of Hardness Testers for Quality Control

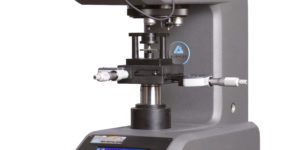
With an intuitive user interface, custom designed optics, USB data communication, LED illumination, six turret positions and integrated digital camera, these MicroMet 6000 Series of instruments from Buehler establish a new class of dead-weight micro-indentation Vickers/Knoop hardness testers.
ADVANCES IN FIVE-AXIS CMM INSPECTION
Denis Zayia of Renishaw explains how five-axis CMM inspection brirevongs the same efficiency to part measurement as five-axis contouring has brought to metal cutting by dramatically improving throughput, opening up lean efficiencies, and documenting parts to ever-tighter tolerances. Retrofits of such systems allow manufacturers to realize greater value and productivity from their CMM investment.
USB INPUT TOOL CONNECTS HAND MEASUREMENT INSTRUMENTS TO PC
Transfer data values from calipers, micrometers, indicators, depth gages, height gages, bore gages, surface roughness testers, and laser scan into a PC using the new USB Input Tool Direct: USB-ITN® from Mitutoyo America.
GEAR WHEEL MEASURING TECHNOLOGY MOVES INTO SMALL WORKSHOPS
With its compact DuraMax 3D coordinate measuring machine, Carl Zeiss gear wheel measuring technology can be used close to production because it is suited for process control on the production floor for quick in-between inspections of small workpieces and for testing volume parts directly in production.
NON-CONTACT 3D IMAGING SYSTEM COLLECTS MILLIONS OF POINTS IN SECONDS
This new inspection system from FARO Technologies uses patented Accordion Fringe Interferometry (AFI) technology that is ideal for quality control, reverse engineering and rapid manufacturing of complex shapes or large, smooth surfaces.
WHAT YOUR SHOP NEEDS TO KNOW ABOUT PORTABLE CMMs
Ron Branch of V&M Precision Machining and Grinding explains why rapid shop floor inspection with portable CMMs is sophisticated enough to satisfy the demands of the aerospace industry, but also perfect for the small or medium machine shop.
MICROMETER LINE HAS 15 NEW TOOLS AND MEASURING RANGES
Reduced price and broadened product offering for 795 and 796 electronic micrometers.


