Improve Results With These Tips for Weld Preparation
Select the right abrasive product for your application and follow best practices to achieve the results you want.
Posted: August 2, 2024

Before welding in any type of application, proper planning and material preparation can help ensure you’re producing high-quality results. It’s important to consider numerous factors, including what type of material you’re working with and any final finish requirements.
Below are weld preparation strategies and tips that can help you save time, reduce rework and optimize the process.
Tip 1: Pay Attention to Proper Cut, Fit and Bevel
Preparing the metal for welding often involves cutting, fitting and beveling it. The requirements for these steps may depend on the type of welding process you will use as well as the finish requirements for the final part. Taking care to be precise with the initial cut can reduce the amount of time spent on cleaning later.
Various tools can be used for cutting. Options include a torch or plasma cutter, CNC tables, shears or manual tools such as cutting wheels. Offhand cutting with a right angle grinder is a cost-effective and portable option for many applications. Be sure to make the initial cut as clean and straight as possible, since a clean, consistent gap between the two pieces to be welded helps produce a stronger weld that requires less filler metal.
Tip 2: Clean the Surface Well
When you’re preparing the surface for the initial welding pass, remember that starting with the cleanest possible base material greatly increases the chances for a strong weld. Clean the work surface thoroughly within 1” of the weld joint on both sides. Remove any mill scale, contaminants and coatings from the base material to help ensure proper weld penetration and to eliminate impurities, porosity and inclusions.
You may be able to use acetone and a wire brush rather than an abrasive product for cleaning with certain stainless steels or other alloys. But in applications where an abrasive product is needed for surface cleaning, be sure to think about how much material you want to remove. A good practice is to start with a less coarse abrasive and step up the aggression only as needed. For example, removing heavier coatings and mill scale often requires a grinding wheel or a flap disc.
Flap discs are easy to control and can be used to grind, finish and blend all at once. Grinding wheels are more aggressive and durable, which is helpful in certain applications. Be careful to avoid removing too much base material when using a grinding wheel.
Tip 3: Choose the Right Abrasive Product

Abrasive products are available in numerous profiles, styles and grain options. Choosing the right one for your base material and the specific application can help make the job easier.
When it comes to selecting the abrasive grain, a coarse abrasive is not always the fastest, most efficient choice. It will remove material faster, but that may not be what you want for the job. Using an abrasive that is too coarse can result in removing too much material or damaging the workpiece. In some cases, choosing a finer abrasive is the better option because it allows you to minimize the number of passes needed and avoid rework due to part damage.
In addition to the abrasive grain, you also need to select the right type of abrasive product for the job. Options include wire wheels, flap discs and grinding wheels. All of these products are available in different profiles, styles and sizes to meet varying needs.
Wire wheels are more resistant to loading and do not remove base material. They can be used to remove surface dirt and coatings without harming the workpiece. Bonded abrasives are designed to cut and remove base metal, providing more aggressive cleaning action.
Be aware of the benefits offered by the different styles and profiles of abrasive products. For example, a type 27 (flat profile) flap disc will create much different results than a type 29 (conical profile) flap disc. Using the wrong profile for your job can limit the amount of contact the abrasive has with the surface metal. A type 27 disc is good for lower grinding angles of 5° to 10° where light pressure is used, such as for finishing and blending. A type 29 disc is a good choice for grinding at higher angles (15° to 30°) when you need more aggressive material removal.
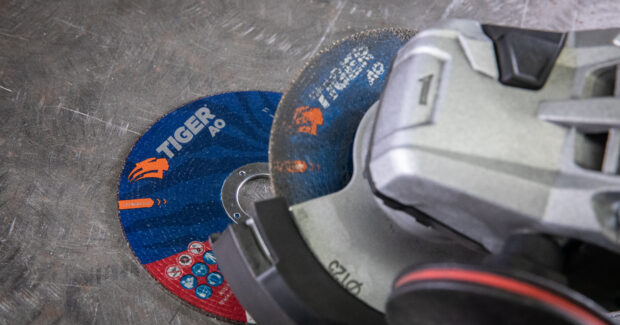
In the grinding wheel category, Tiger® 2.0 metal grinding and cut off wheels from Weiler Abrasives are designed for faster and more efficient metal grinding and cutting, lasting up to 40% longer than other grinding and cut off wheels. The advanced 2.0 bond formulation of the wheels reduces uneven edge wear and chipping, improving the user experience and extending wheel life. In addition, the Optimum Use Line marked on each wheel ensures that operators are using the wheel to its full life, reducing consumable waste and downtime for changeover.
Tip 4: Use Proper Technique
No matter what abrasives you’re using, following some best practices can help you get the best results.
When using a grinding wheel, lower the grinding angle. This maximizes control and reduces the risk of gouging. The outside corner of a grinding wheel is the most aggressive, so the steeper the angle of approach, the greater the risk of removing more material than you want and possibly damaging the workpiece. Lower the angle to widen the wheel’s surface contact with the workpiece and reduce aggressiveness.
With any type of abrasive, whether it’s a grinding wheel, flap disc or wire wheel, watch the amount of pressure you are using. Pressing too hard can alter product performance and possibly damage the abrasive or the workpiece — and contribute to operator fatigue.
Lastly, it’s important to use smooth, consistent strokes and avoid short, choppy strokes. Enter the grinding stroke with a pull rather than a push, which helps control wheel aggression. This provides effective results with both coated abrasives and bonded abrasives.
Proper Prep for Success
Cleaning and preparing the base material are key first steps in producing high-quality welds. But when you’re removing impurities, dirt and coatings from the workpiece, you want to avoid removing too much surface material or damaging the piece. To achieve the results you want, it’s important to select the right abrasive product for your application and follow best practices for using those abrasives.


