Latest Automated Vision Inspection of Welds Produces Repeatable Results
The evolution of automated vision inspection of welds in automotive line
assembly produces precise and reliable results by reducing rejects, rework, and more, while increasing throughput.
Posted: April 22, 2024
Automotive component manufacturers face a number of production challenges. Among the most vital is maintaining a high level of product quality, supported by consistent production throughput with systems that ensure profitability. A key function in this process is assembly, especially as the demand for more automated sensing and control devices, connectivity, infotainment, and electric vehicle components, continue to push the need for more complex assembly requirements. The need to manufacture more complex assemblies poses challenges for process engineers in their manufacturing and assembly functions. Particularly so, as automotive component manufacturers are increasingly mandated by stricter requirements to document quality assurance of their manufactured products along each step of production. A critical component supporting vehicle safety in automotive manufacturing is maintaining integrity in weld seams. Today’s cutting-edge technology uses automatic welding for assembling vehicle body frames, axle components, powertrain systems, passenger seats, steering wheels, electric vehicle battery trays, and dozens of other components. Defective weld seams, especially in safety-relevant automotive components, can lead to serious problems for manufacturers. The need to rework mis-welded components, interrupted production lines, and in worst-case scenarios product recalls and liability claims, can cause manufacturers significant costs. Consequently, inspecting welds for defects becomes a critically import function in automotive component assembly.
Latest Evolution of Automated Weld-seam Inspection
Manual inspection of welds in automotive assembly is prone to errors and costly to perform.
Production efficiency can be increased considerably when the inspection of weld seams is fully automated. The latest generation of inspection systems perform with extremely high reliably. Every weld seam is automatically inspected and documented after each manufacturing step to minimize serial defect trends and ensure product quality traceability.
- Integrated Inline Inspection
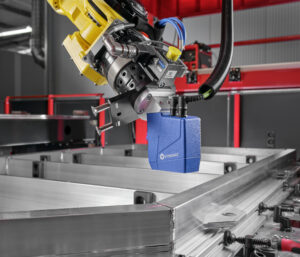
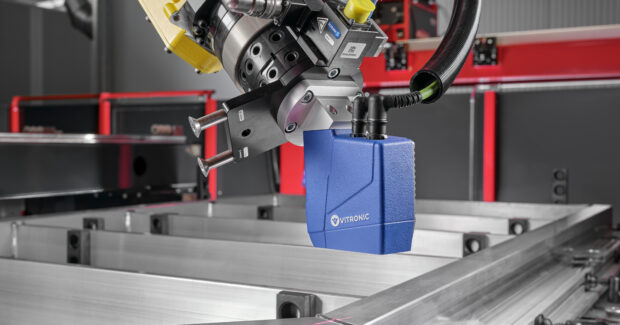
The latest evolution of automated weld-seam inspection consists of an inspection cell with a sensor that is installed directly in the welding station at various locations. Because the inspection takes place in the welding line directly, it is easy to quickly intervene in the upstream welding process should a component require rework. As a result, defects are consistently identified and reduced, processes are optimized, and down time, reworking and waste are avoided.
Supporting the inspection cell-sensor is high-performance computer processing capability equipped with software for trending and analytics.
- Expanded Inspection Range
Unique to this new generation of automated weld inspection is an exceptionally broad sensing range. The inspection criteria can be configured to suit diverse requirements and applications.
The system is extremely reliable, even when it encounters flat seams, highly reflective materials such as aluminum, seams with differing geometries, and fast image recording speeds.
This expanded range of inspection includes several parameters, such as throat thickness; distance in X, Y; undercuts; hole/burn-through; weld connection signal jumps; seam connection angle;
seam width/length; seam width/position for overlap seams; seam position; convexity or incompletely filled groove; seam irregularity; weld volume; butt weld; surface irregularity; object height; porosity; spatter; gap width for overlap seams; unequal leg length and deepening.
The automated weld inspection is capable of pinpointing the exact size and position of each defect and classifying them. It clearly identifies the tiniest geometric and cosmetic deviations.
- Simplified Reworking
All information relating to the weld seam inspection is visualized in the software of such a
weld-seam inspection system. From setting parameters for inspection to the display of defects for reworking. Clear visualization of defects in live operation are displayed as:
- a) Real images
- b) Precise, detailed inspection images
- c) 3D visualization
Defects can be easily analyzed and reworked because of the various visualizations. Software provides detailed instructions for reworking.
Automated Weld-seam Inspection
Leading the evolution into this new generation of automated inspection of weld seams is the VIRO WSI Weld Seam Inspection System, from VITRONIC Machine Vision. This system integrates inline inspection, expanded inspection range and simplified reworking.
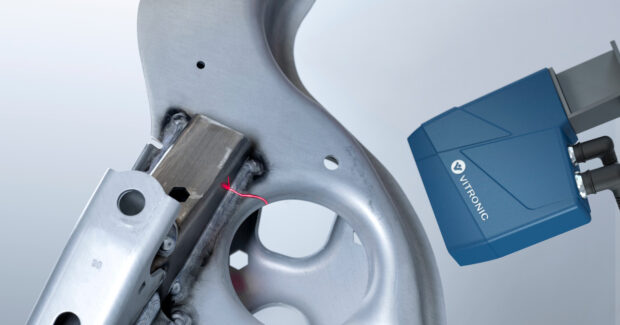
The optical inspection system is a fully automated solution that inspects all weld seams and detects defects as small as 0.1 millimeter, visualizing these for reworking. The system uses laser triangulation. This allows laser seams and fine brazed seams to be inspected quickly and with high resolution in 3D. The sensors were specially developed for inspections on reflective materials like aluminum.
Seamless Documentation and Analysis
In the inspection system, all weld-seam inspections are seamlessly documented, stored in an integrated database, and are fully traceable during the entire production process.
The parameters for quality inspection can then be adjusted during the production process and automatically applied to the next system cycle. This minimizes costly reworking and scrapping of parts.
Integrating Weld Data with Process Data Supports Process Optimization
Inspection data may enable operators to identify weld-seam errors, but it does not reveal what caused them. Supporting this new generation of weld-seam inspection is VITRONIC WeldLoop software, which links data from VIRO WSI with a welding system’s process data. This allows large data volumes to be efficiently analyzed and trends recorded graphically.
The software enables visual representation of the connections between optical image data, measured inspection data and process data. By comparing the seams, deviations can be detected very quickly, and possible sources of errors can be pinpointed.
The additional data obtained can be used to optimize the welding process much faster and in a more targeted way to prevent future defects. As a result, manufacturers can significantly cut costs, reduce downtime and avoid waste.
Weld-seam Optimization of Critical Automotive Components
Such a latest-generation automated weld-seam inspection system supports manufacturers in delivering automotive components of consistent high quality, while having a direct impact on better managing production volumes and costs.
- Vehicle Body Weld-seam Inspection
Weld-seam detection presents a particular challenge with flat vehicle body seams. Even the slightest defect can affect the integrity and salability of the vehicle. All welding defects in the vehicle body — on both visible and invisible seams — need to be detected immediately after the welding process and corrective actions swiftly implemented.
- Weld-seam Inspection for Axle Components
Axle beams and transverse control arms are essential elements of a safe chassis subframe. Their quality is critical to the long-term safety of vehicle occupants. The most advanced automated weld-seam inspection should be employed to identify defects and get them corrected before the axle components reach further processing stages.
- Weld-seam Inspection in EV Battery Production
In the production of electric vehicles (EVs), lithium-ion (Li-ion) batteries play the leading role. The battery directly affects the driving performance, driving experience and durability of the vehicle. Defect-free contacts are essential for powerful, long-life Li-ion batteries. With cell housings the weld seams must guarantee a hermetic seal over the entire life of the battery. Battery boxes are often integrated into the bodywork as a structural element. They must be stable and able to withstand a crash. Lightweight materials are mainly used in EV batteries and battery housings, such as thin foils and non-ferrous metals like copper and aluminum. Laser welding allows thin and small components to be joined precisely at high speed. To leverage this technology, the processes must function reliably. The laser welding process, however, cannot be visually inspected during operation. Defects can only be detected during a subsequent visual inspection of the workpieces. By this point, further rejects have already been produced and the line must be stopped to determine the cause. Such expensive interruptions can be prevented with an automated inspection system that monitors the welding process in real time.


