Detailed Measurement and Inspection in a Rapid Amount of Time
High-speed scanning provides thorough throughput with clear-cut and accurate results.
Posted: January 17, 2023
Lasers, scanners and 3D metrology systems are faster and more precise than ever before, requiring minimal hands-on operation.
Breakthrough LADAR Technology Sets new Standard in Metrology
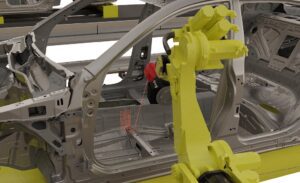
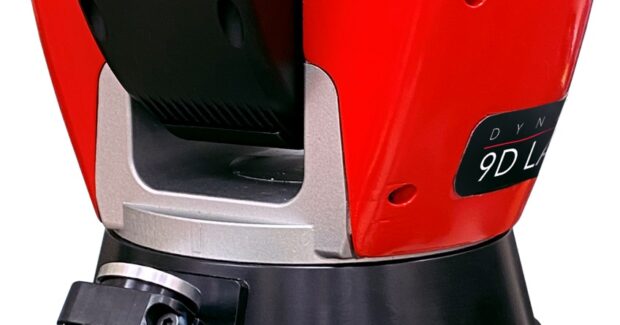
Automated Precision, Inc.’s (API) (Rockville, MD) Dynamic 9D LADAR is an innovative system that captures both dimensional and surface geometry data. The patent-pending Dynamic 9D LADAR offers the world’s first interferometry-based LADAR system incorporating Optical Frequency Chirping Interferometry (OFCI) technology.
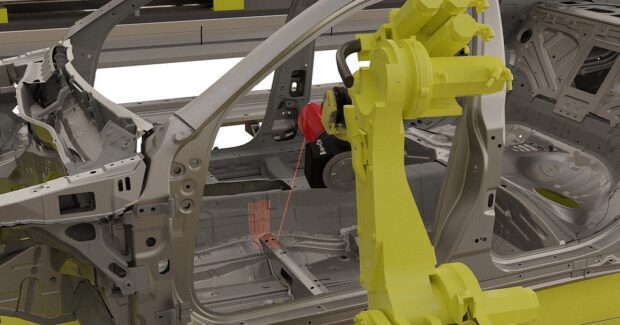
9D LADAR’s accurate data collection of production measurements represent the next generation dimensional inspection solution, replacing traditional, off-line, large volume CMMs and near-line and in-line inspection solutions using both optical laser-line and structured light scanning sensors.
The two-axis system processes measured data at a rate of 20,000 points per second and with scanning speeds of 0.2 seconds/cm2. Furthermore, its high dynamic range is insensitive to target reflectivity, can measure translucent materials, and is able to measure target features with up to an 85° incidence angle. High-density raster scanning delivers up to 50 lines/second, with 0.1 mm line spacing. 9D LADAR’s on-board scale reference system delivers unparalleled 2D and 3D accuracies of just 6 µm/m providing comparable accuracies to benchmark accuracy large volume CMMs.
Dynamic 9D LADAR’s compact design, weighing just 10.4 kg, incorporates an integral controller with ethernet communication, allowing for seamless integration to both portal CMM frames or 6-axis industrial robots, including 7-axis rail mounted configurations.
High-speed Integrated 2D and 3D Measurement System
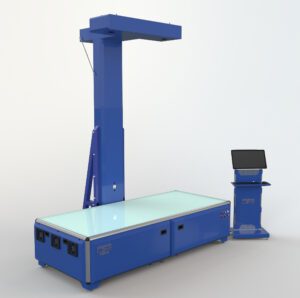
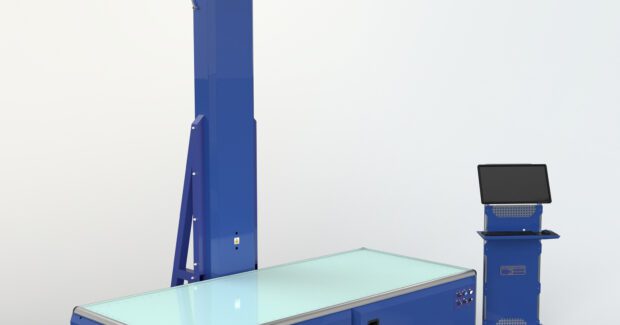
Exact Metrology: A Division of In-Place Machining Co. (Brookfield, WI and Cincinnati, OH) and a comprehensive 3D metrology service provider and hardware sales company, represents Planar from InspecVison. This 2D inspection machine allows manufacturers to verify product quality simply and quickly by performing 2D inspection, CAD comparisons and reverse engineering in seconds.
Planar is ideal for shop floor use, requires minimal operator input and increases production throughput across a wide range of applications. These include flat and folded/formed sheet metal components, gaskets and seals, laminations, O-rings, paper acetate and electronic drawings and other opaque and semi-transparent flat materials.
A standard feature on every Planar system is 2D reverse engineering. Existing parts can be reverse engineered quickly, creating dxf or dwg CAD files. The software allows the user to edit and clean the data such as standardization of hole sizes and clean edges and eliminates the need for hand measurement and CAD programming. Physical parts or even paper, acetate or electronic image files can be reverse engineered to create CAD files. Furthermore, reverse engineering processes can also be carried out in 3D using optional 3D modules. For full 3D capability, users simply add Opti-Scan 3D, while the SurfScan module extends Planar to 2.5D.
The Opti-Scan 3D is a non-contact white light scanning system that uses a high-speed, high-resolution camera and an LED DLP projector to scan the surfaces of an object. SurfScan integrates seamlessly with the Planar 2D automatic inspection software to allow accurate inspection of both the part’s 2D shape and its 2.5D features with a single click. The SurfScan is a high-resolution projector which mounts onto the existing Planar vertical column.
Portable Inspection Tools are More Precise and Improve Productivity
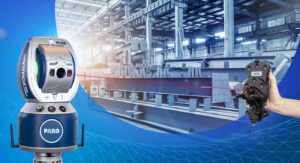
FARO® Technologies, Inc. (Lake Mary, FL), a global leader in 4D digital reality solutions, recently released the new FARO VantageS6 Max and VantageE6 Max Laser Tracker series. They offer comprehensive, large-volume 3D measurement up to 80 meters, significantly streamlining processes and reducing inspection cycle times while ensuring complete confidence in the results.
The new Vantage Max enables organizations to increase their throughput while maintaining high inspection accuracy with an attractive 3D metrology option that expands upon the proven track record of the FARO Vantage series. The trackers maximize 6 degrees of freedom (6DoF) measurement capabilities via the optional 6Probe, enabling precise measurement of hidden areas and small features.
The 6Probe is a 6DoF solution that meets the dynamic measurement, speed and accuracy requirements of the most challenging industrial applications. With kinematic self-identifying styli, users can change probing tips quickly and measure without any recalibration, plus measure hidden areas outside of the tracker’s line of sight with wide acceptance angles.
Moreover, the new Vantage Max provides more accurate 6DoF probing that helps speed up inspections and reduce the number of tooling changes and device moves. Previously, users relied on a spherically mounted retroreflector to measure high accuracy points which meant the user had to select an appropriate target nest and have line of sight. Typical users of the new trackers can now save up to 60 minutes each workday.
Laser Technology Easily Adapts to Inspect a Variety of Gears
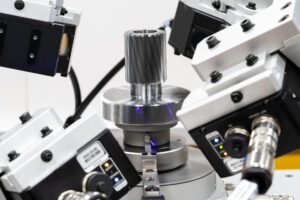
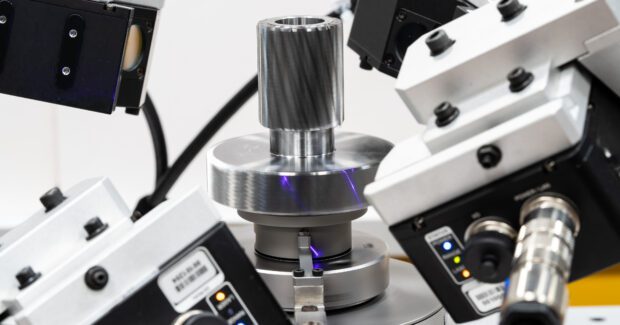
Marposs Corp.’s (Auburn Hills, MI) new M62 Laser Profiler for Gear Inspection uses laser profile sensors and the optical triangulation principle. As compared to dedicated gear gauging systems or gear laboratory machines, the use of laser technology in the M62 enables it to easily adapt for inspecting a variety of gear sizes and shapes in a very short time.
The laser profilers project a laser line on the gear at a specific angle, collecting data to generate the entire Z-X profile through an image sensor placed behind the optical receiver. The gear is then quickly rotated 360° to collect data points from movement along the Y axis, which is combined with the Z-X profile to create a complete 3D reconstruction of the part, made possible through specific software algorithms. The system then executes the requested measurement and inspection tasks. Line operators can easily review images and navigate to the desired level of detail to identify any anomalies.
The M62 Laser Profiler can inspect odd or even toothed helical and spur gears with external diameters from 30 ÷ 300 mm and heights ranging from 15 ÷ 40 mm with capability to measure characteristics having tolerances up to 5-10 µm. With a cycle time of approximately 40 seconds, it has the precision to accurately inspect many micro-geometric features including profile crowning (Cα) and profile slope deviation (fhα).
Like other members of the M62 family of gear measurement solutions, this non-contact system can be interfaced with Marposs electronic measurement display units.
Advanced Non-contact Measuring System Delivers More Versatility
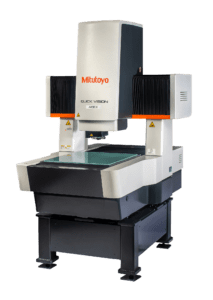
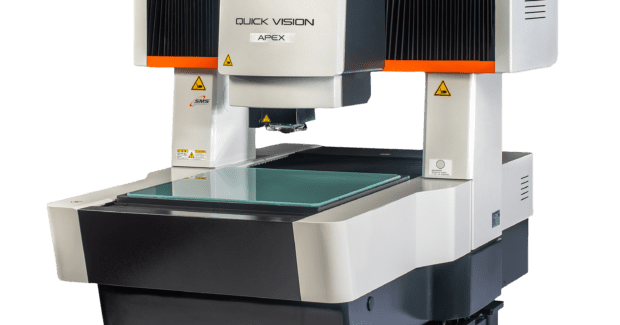
Mitutoyo America Corp.’s (Aurora, IL) Quick Vision (QV) Pro Series machines, the latest generation of Mitutoyo Vision Measurement Systems, are packed with high-performance technologies that greatly improve 3D non-contact measurement and productivity. This highly advanced non-contact measuring system delivers even more speed, efficiency and versatility to the Mitutoyo Vision Measurement line.
The QV Pro Series features the newly developed StrobeSnap vision measuring function that speeds up run time by approximately 35-to-45% regardless of measurement position or continuity while achieving higher throughput and high-precision measurements.
Auto focus on the QV Pro Series is about 39% faster than previous models, which were already fastest in their class, without loss of accuracy. An optional Stream function realizes very high throughput using non-stop measurements that synchronizes the main XY unit drive and strobe lighting. Stream takes images intermittently without stopping the stage and performs batch measurements at the same time.
The Optional Tracking Auto Focus (TAF) utilizes a laser tracker that will keep the part in focus while moving the joystick, eliminating the need to keep manually focusing on the part if it isn’t flat. When a part program is running, TAF keeps the part in focus so the program doesn’t have to stop for auto focus and also stops potential errors from occurring if the part is out of focus. TAF cuts speed measurement times by approximately 30%.
Blue Laser Technology for Non-contact Measurement Offers Many Benefits
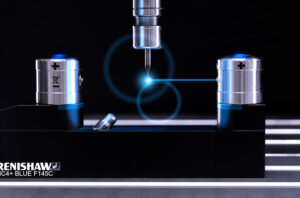
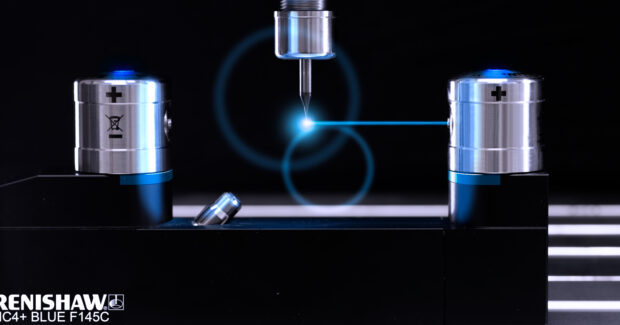
Global engineering technologies company, Renishaw Inc. (West Dundee, IL), offers its second-generation NC4+ Blue non-contact tool setting solution. Building on the success of the original NC4+ Blue, the latest evolution of the non-contact tool setter features an ultra-compact design and is available in four sizes, with operating gaps ranging from 55-to-240 mm. Measurement repeatability has also been improved across the range, now down to +/- 0.5 micron on smaller separations.
Featuring industry-first, blue laser technology and improved optics, Renishaw’s NC4+ Blue systems deliver significant improvements in tool measurement accuracy, ensuring components can be machined more accurately and efficiently.
Compared to red laser sources found in conventional non-contact tool setters, blue laser technology has a shorter wavelength resulting in optimized laser beam geometry. This enables the measurement of very small tools, while minimizing tool-to-tool measurement errors — a critical consideration when machining with a wide range of cutting tools.
NC4+ Blue systems use Renishaw’s non-contact tool setting software package, which continues to evolve to ensure rapid, robust and reliable measurement even in wet conditions. Auto-optimization technology within the software automatically adjusts the movement of the tool in and out of the beam to minimize any wasted movement and therefore cycle time. While features such as a dual measurement mode, where the tool is measured as it exits the laser beam and an advanced tool cleaning option, help ensure the tool is free from debris and coolant during measurement. Further enhancements to tool run-out and profile measurement cycles deliver increased functionality and reliability to advanced users.
The NC4+ Blue features superior optical protection with the MicroHole™ and PassiveSeal™ optical protection technologies, which enable fast and reliable tool measurement, even in wet conditions.
NC4+ Blue support is embedded into Renishaw’s range of graphical user interfaces, including on-machine and mobile apps such as Renishaw Set and Inspect and GoProbe. These consistent,
easy-to-use programming platforms are perfect for users who are new to probing or have little machine code knowledge, while still offering operational benefits to more experienced users.
What’s more, with the latest version of Renishaw’s on-machine Reporter app, users can now view historical tool data captured by the NC4+ Blue and stream the measurements in real-time. Results can also be exported via CSV file or PDF report and either stored for traceability or imported into in-house quality analysis software.
Subscribe to learn the latest in manufacturing.


