3D/Additive Manufacturing, Forming & Fabricating
3D and additive manufacturing solutions will be displayed at FABTECH.
Posted: October 3, 2022
The Latest in Cold Saws, Ironworkers, and Hydraulic Presses can Improve Production
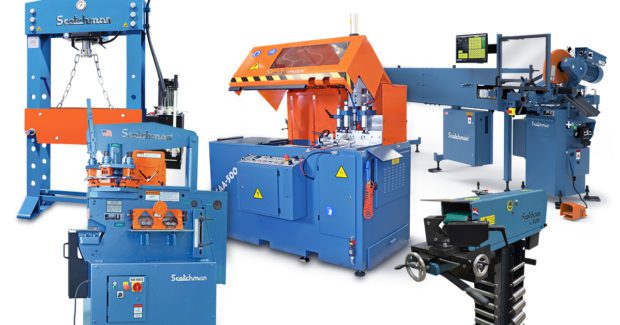
A complete range of general to heavy-duty metal fabrication machinery from Scotchman Industries (Philip, S.D.) will be presented at Booths BC15301 and BC15401. Live equipment demonstrations will showcase the features, benefits, cut quality and how the right equipment makes your job easier and gets the best results with these Scotchman products.
Ironworkers to be featured include:
- DO 95: American made dual operator ironworker machine has a hydraulic system designed with two pumps allowing two operators to use the machine at the same time and ensures that both operations have full hydraulic pressure and speed. The DO 95 has a 95-ton capacity punch and a 9” throat depth, which can punch a 1-3/16” hole in 1” material. Other workstations include a 24” flat bar shear, rectangle notcher, angle shear, and a tool table that accepts a wide variety of tools.
- 5014-ET Ironworker: The world’s first and only 50-ton hydraulic ironworker with a revolving 3-station turret punch. The innovative revolving turret accepts up to three different punch sizes that can be changed in seconds, reducing setup time and increasing productivity. This American made hydraulic ironworker features 50 tons of pressure and can punch a 13/16″ hole in a 3/4″ plate. Other workstations include a 14” flat bar shear, rectangle notcher, angle shear, and a tool table for using a large variety of additional tools.
- FI85: An 85-ton ironworker with five fully integrated workstations.
- 50514 EC w/Automated Measuring System: A 50-ton ironworker coupled with an automated measuring system.
Hydraulic Press to be featured:
- PressPro 110 Hydraulic Press: A 110-ton workshop press has a movable cylinder (left-right) and an in-height adjustable working table. This heavy-duty hydraulic press is industrial-grade and ideal for assembly, straightening, fabrication, quality control, maintenance, product testing, bending and forming.
Cold Saws to be featured include:
- CPO 350 w/Digital Quick Stop Measuring System: A 14” manual cold saw with digital length gauge.
- CPO 350 PKPD VS: A 14” variable speed semi-automatic cold saw.
- CPO 350 AutoLoader: A fully automatic sawing system with bundle loader option.
- CPO HFA CNC: A hitch feed automatic saw CNC for unlimited cut length settings.
- SUP 600 AngleMaster: Large capacity precision upcut nonferrous saw. Combines an automatic mitering ability with a programmable feed.
- GAA 500 CNC DT20: Precision CNC controlled upcut automatic saw for cutting nonferrous at 90° with 20 mm drill tap.
Additional equipment models to be shown include:
Pipe Notcher models: AL1-2E and AL150 HS.
Measuring Systems: AccuTable Digital Caliper Table for long lengths.
Booths BC15301 and BC 15401
Creaform to Reveal Easier Access to Automation
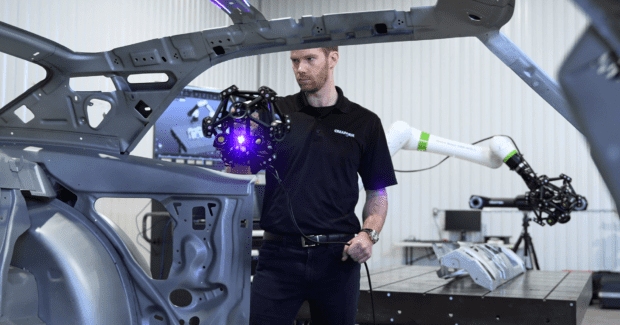
Creaform (Lévis, Québec, Canada), a brand of AMETEK Ultra Precision Technologies Division and worldwide leader in portable 3D measurement solutions and engineering services, will present the latest innovations in quality assurance in Booth BC16131. Creaform will take this opportunity to display its multitude of hardware and software solutions, including the most recent offer for metrology applications using collaborative robots.
The simplicity of deployment, speed and accuracy of Creaform’s 3D measurement solutions provides is sure to pique the curiosity of quality control managers and production managers of all industries. Creaform’s handheld and automated 3D solutions have been designed to accelerate the time-to-market with product development workflows, all while helping quality control challenges. The attendees will discover how Creaform’s 3D scanners can help them gain a competitive edge, cut the time and costs associated with product development, and optimize production processes.
They will also get the opportunity to ask questions directly to Creaform’s experts and get a hands-on experience with Creaform’s complete product portfolio, including the automated Quality Control solution MetraSCAN 3D-R as well as the handheld 3D scanners for inspection, HandySCAN 3D and MetraSCAN 3D and the Go!SCAN 3D for design and prototyping.
Creaform’s motto is Never Stop Innovating, which represents the core values of Creaform, from its beginning in 2002 all the way to 2022, which marks the 20th anniversary of the company. Creaform develops, manufactures, and sells cutting edge 3D portable and automated measurement technologies that provide innovative solutions for applications such as 3D scanning, reverse engineering, quality control, non-destructive testing, product development, and numerical simulation (FEA/CFD). Its products and engineering services are used in a variety of industries, including automotive, aerospace and more.
Booth BC16131
3D Scanning Technologies are the Keys to Additive Manufacturing and Reverse Engineering
In the digital age, it’s surprising to learn that the world is full of objects that lack a digital blueprint or CAD history. But this is a common challenge when dealing with product design. To account for this, part producers turn to reverse engineering, or reproducing another product based on a detailed review of its physical construction or composition. With traditional measurement methods, this was a time-consuming process.
However, innovative manufacturers tasked with producing or building replacement parts without an associated digital file rely on 3D scanning technologies like those offered through the Quantum Max Scan Arms and Vantage Max Laser Tracker from FARO® (Lake Mary, FL) to create a CAD file based on the scanned object or part. Once this digital blueprint is created, it can be applied to additional additive manufacturing needs, as those additions are based on the accuracy of the computer-aided-design. Faro will be in Booth BC16224.
By depositing material, layer upon layer, in precise geometric shapes, additive manufacturing offers numerous benefits, including reducing the cost of entry into various markets, reduced waste and materials, greater ease in re-creating legacy parts, and on-demand versus on-hand inventory.
Typically, the 3D measurement process includes multiple steps. First, the object is scanned with a product like the FARO Quantum Max and a point cloud, which identifies the shapes, contours, and dimensions of the part. Next, the collected data is rendered into a CAD file, or a 3D replica of the part.
To achieve the first step of data collection, a variety of 3D scanning technologies are available. However, arm-mounted laser scanners typically have fewer limitations than other technologies and are more advanced when it comes to capturing smooth, organic geometries up to a certain level of detail. Further precision can be achieved via the use of a hard probe, which captures precise geometric features, as well as sharp machined lines.
The Quantum Max, which combines the measurement capabilities of a Quantum Max FaroArm® portable coordinate measuring machine with the non-contact functionality of a laser line probe, also offers three laser line probes that optimize accuracy, speed, or a blend of both, depending on project need. Whichever LLP is selected, 3D ScanArms capture precise measurements in nearly any environment, from the factory floor to the field.
Meanwhile, the new Vantage Max Laser Tracker series enables organizations to increase their throughput while maintaining high inspection accuracy. The trackers maximize 6 degrees of freedom (6DoF) measurement capabilities via the optional 6Probe, enabling precise measurement of hidden areas and small features.
Additional benefits include the reduction of scrap and waste associated with having fewer unusable design iterations, and the elimination of finished parts that do not match the design intent. There’s also the ability to produce higher-quality finished parts and products as 3D scanning ensures a complete understanding of the part and all its complexities.
Booth BC16224
Subscribe to learn the latest in manufacturing.


