Accurate and Precise Measurement Tools Ensure Trouble-free Inspections
Today’s small and modular designs are adaptable to almost any machine size and challenge, providing ideal measurement solutions.
Posted: August 23, 2022
Innovative gages, instrumentation and machine tool probes make life easier for machine tool operators by transforming the way they perform inspection applications.
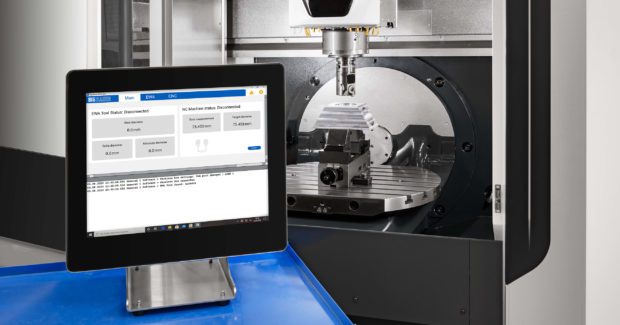
EWA Automatic Fine Boring System Performs Without a Human Operator
The BIG KAISER EWA Automatic Fine Boring System from BIG DAISHOWA (Hoffman Estates, IL) performs closed-loop boring operations without a human operator. This breakthrough eliminates the need to stop the spindle to manually adjust the boring tool, which results in considerable time savings. Also, eliminating human interaction reduces cost, improves accuracy and minimizes scrap. The adjustment range of this fine boring head allows for the handling of multiple bore sizes with the same tool and ensures a repeatable boring process.
The EWA fine boring head is available in two sizes, one with a boring range of Ø2.677″-5.276″ (Ø68-134mm) and the other with a range of Ø.394″-2.126″ (Ø10-54mm). EWA kits are also available for each of these head sizes. These can include inserts, insert holders, a controller, antenna and protective case.
The EWA can be used on machines with BT/BBT30-40-50, CV/BCV(SK)40-50, BIG CAPTO 5-6-8 and HSK-A63-80-100-125 spindles. The Automatic Fine Boring System can be integrated in three primary configurations: fully integrated, PC control, or tablet control.
Next-generation OEM Objectives Enable the Scientific Instruments of Tomorrow
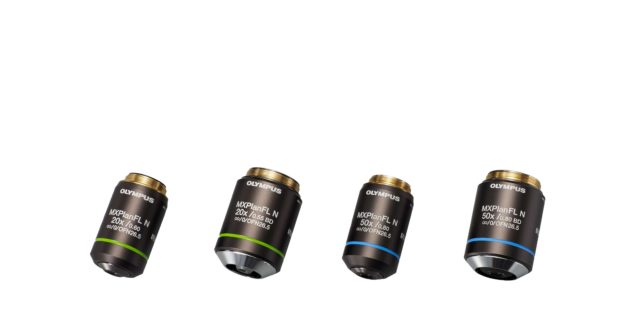
Evident (Waltham, MA), a new wholly owned subsidiary of Olympus comprised of its former Life Science and Industrial divisions, released new objectives for OEM integrators and Olympus industrial microscopes* that combine a high numerical aperture and long working distance, providing exceptional flexibility in various inspection applications.
Objective lenses are crucial to a microscope’s performance. New MXPLFLN series objectives are manufactured using novel lens polishing technology, so more lenses can fit in each objective housing. This enables users to view high-resolution, high-magnification images at 20x and 50x while maintaining a 3 mm working distance. When inspecting three-dimensional objects — such as circuit boards or semiconductor wafers — there is less chance of the objective hitting the sample and causing damage. Four objectives are available in this series: brightfield 20x and 50x and brightfield/darkfield 20x and 50x.
*The objectives are compatible with BX53M, MX63 and GX53 microscopes.
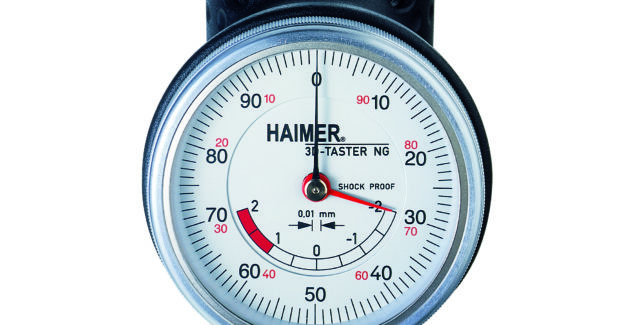
Easier to Find the Edge: HAIMER’s 3D Sensor New Generation
For users looking for measurement tools for their machines, HAIMER’s (Villa Park, IL) 3D Sensors are the perfect solution. The HAIMER 3D-Sensor New Generation combines precise and fast positioning capability, which provides the accuracy required when cutting parts and ensures viable control, even in the most demanding applications. It can set zeros, align workpieces, check surfaces’ straightness and levelness, and measure basic part features from edge to edge.
Quickly find the exact positioning of the spindle axis on the edges of the workpiece without the math of calculating the probe’s diameter. Find the center of your bore, find your edge and inspect your parts — all possible with the measuring precision and pre-calibrated HAIMER 3D-Sensor New Generation.
The unit has a large overrun distance in connection with the probe tip’s preset breaking point, giving the sensor a long life. The machine’s X, Y, and Z axis can be set without any calculations because the spindle axis is positioned exactly on the approached edge. It can be easily read from a long distance (i.e., when mounted on a large machining center). The display is shock-proof, splash-proof, and dust-proof (IP67) and can be stored in the machine’s tool magazine.
Distinguished through first-class materials and straightforward handling, HAIMER delivers a consistent and rewarding application every time. HAIMER is the European market leader in high precision tool holders and the worldwide leader in tool shrinking, balancing, and presetting for the metal cutting industry.
Linear Feedback Optimized for Machine Tools
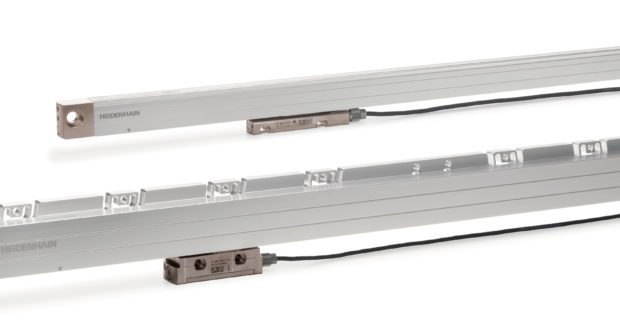
Specially optimized for feedback on machine tools is HEIDENHAIN’s (Schaumburg, IL) latest generation of linear scales, the LCxx6 series. Designed with an optimized internal scanning system, this series is resistant to liquid contamination and is quickly becoming the industry standard for position measurement on machine-tool linear axes.
As one of HEIDENHAIN’s most “robust” series of linear scales, the LCxx6 series offers the same mounting profile as its LC 1×5/LC 4×5 encoders, though the newest LC 116 and LC 416 offer a different internal optimized scanning system which makes them easier to deploy. This scanning design utilizes true optimized optics, which ensures clear imaging even with contamination and condensation. This eliminates many air-purge needs which reduces the CO2 footprint by 99%, thus raising the convenience and lowering the cost of closed loop position measurement. This new series closes the gap in performance in harsh environments when compared to inductive scanning.
The new scanning principle used in the LC 116/LC 416 promises to extend several cost-saving benefits to its user, such as:
- Reducing the mounting effort for the installer (no need to run line lines for an air purge system).
- Reducing operating cost (less air filter exchanges, less air purge consumption).
- Increasing machine efficiency (less machine downtime due to contaminated scales).
The LC 116/LC 416 encoders share the same profile and measuring lengths as the LC 1×5/LC 4×5 encoders. The available accuracies are ±3µm and ±5µm in either EnDat22 and FANUC05 interfaces (1Vpp and Mitsubishi interfaces are not yet available).
Versatile and Compact Radio Probe with Unique Handling
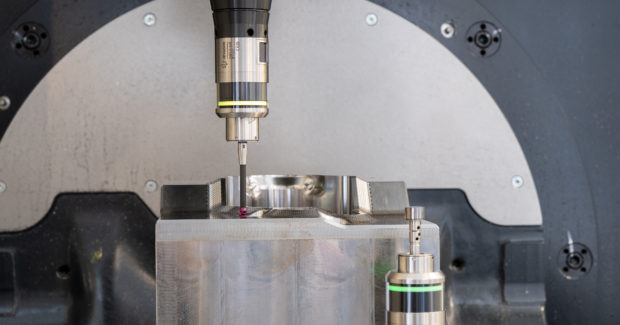
Hexagon’s (North Kingstown, RI) versatile new m&h TP-R-400 multi-sensor radio probe system for machine tools can be used as a probe with different measuring units and as a tool setter. Hexagon is thus closing a gap in its multi-sensor portfolio.
The m&h R-400 makes life easier for machine tool operators by transforming the way they get status information, install the machine, change settings or switch from a probe to a tool tester. It is also the first device to provide direct feedback to the user via a built-in display. Despite its small size, the R-400 is expandable and different measuring movements can be used, making it adaptable to almost any machine size and challenge.
For machine tool builders and large customers who want to save on installation, training, capital and storage costs, R-400 is the perfect solution, as it is the only device on the market that can be used as both a tool setter and a probe. Its small and modular design makes it an ideal solution for machines of all sizes, eliminating the need for additional devices.
New and Unique Chordal Height Gage for Aerospace Application
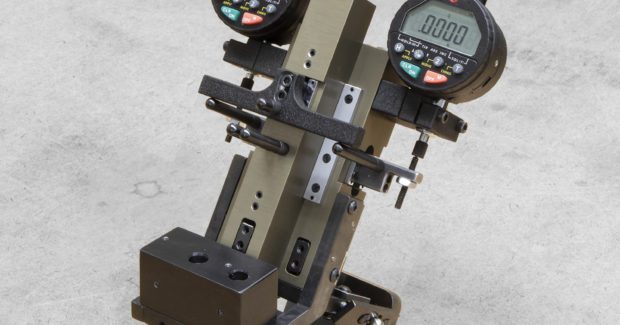
The L.S. Starrett Co. (Athol, MA), a leading global manufacturer of precision measuring tools and gages, metrology systems and more, has introduced a custom designed and manufactured Chordal Height Gage (a.k.a. DO Gage) to be used for measuring the opening heights of turbine vanes at specific locations to verify that an aircraft engine will get proper air flow. The new Chordal Height Gage is part of the Starrett line of special area flow gages.
“Generally, to take turbine area flow measurements an operator must take the nozzle off the production line and bring it to an automated inspection machine, such as a CMM,” said Starrett Special Gage Division Engineer Kyle Webber. “However, the special Chordal Height Gage allows for rapid in-process verification of these parts, eliminating time lost on additional teardown and setup of machinery.”
The size of the Chordal Height Gage is determined based on the specific application it will be used on, and the new gage is no larger than a tissue box. Despite the small footprint of the gage, it has three independent probes which are used to take measurements, including a free-floating central gage body which allows the middle probe to take accurate readings along the trailing edge, regardless of the variable contours which are often on these nozzles. The gage is built in a “lazy-L” shape to enable linear readings to be taken perpendicular to the trailing edge of the blades, giving a dimension for the smallest opening that air can flow through. These features help contribute to the accuracy and repeatability of the Chordal Height Gage, which is within 0.0005″, although the indicator readouts are generally set to a 0.001″ resolution per customer requirements.
Subscribe to learn the latest in manufacturing.


