Smarter CMMs Boost Quality Assurance and Inspection Capabilities
Improvements to coordinate measurement machines speed up the measuring process, and improve accuracy and repeatability.
Posted: June 16, 2022
New features further enhance the measurement solutions provided by CMMs, which have moved beyond conventional machines.
Exact Metrology Now Offers Large-Scale CMM
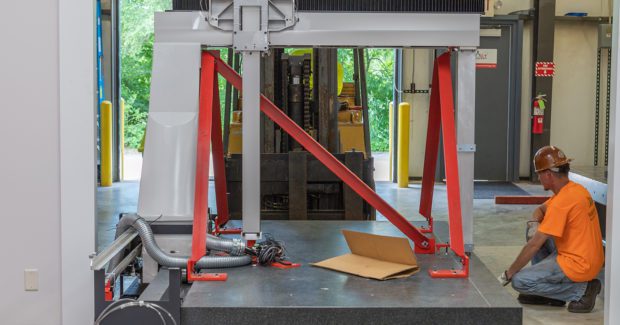
Exact Metrology: A Division of In-Place Machining Co., (Brookfield, WI) a comprehensive 3D metrology service provider and hardware sales company, has installed a large-scale Coordinate Measuring Machine (CMM) at its location in Moline, Ill.
This machine is a high-accuracy CNC coordinate measuring machine that guarantees a maximum permissible error of E0, MPE = (2.5+3L/1000)μm. Measurement uncertainty remains within one-fifth of the dimension tolerance up to 30.2” (766 mm). This CMM offers a maximum drive speed of 693 mm/s and a maximum drive acceleration of 1,732 mm/s2 resulting in an increase of drive distance in one second. Combining high speed and high acceleration, this machine reduces measuring time. As the number of measuring points increases, measuring costs per point are reduced.
Exact Metrology will use the machine for precision machined parts and has a measuring volume of 47 inches by 78 inches. Components, parts and finished durable products that are designed to maintain extreme tight tolerance margins, as well as a high degree of durability are essential and common drivers for the use of precision machining. Precision machined parts typically have intricate features and need precise specifications and measurements.
MiSTAR 555 CNC CMM Available with PH20 Probe
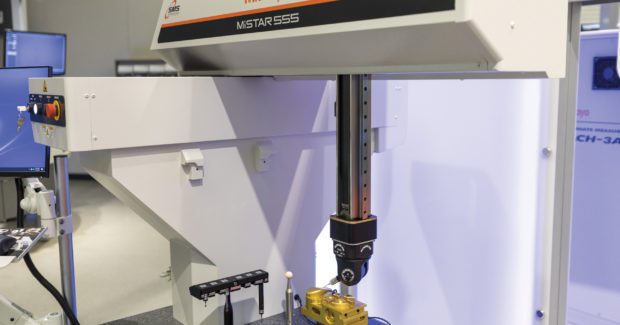
Mitutoyo America Corp. (Aurora, IL) offers the MiSTAR 555 CMM with the PH20 5-axis probe system. The CMM features enhanced measuring capability, increased feature access, and a threefold improvement of throughput. Combined with the MiSTAR’s three-side open architecture, wide accuracy-guaranteed temperature range, environment-resistant absolute scale, and all-in-one space-saving design, the MiSTAR performance is set apart from conventional coordinate measuring machines.
Key features include:
- Enhanced measuring capability with probe head touches: Rapid head touches — where the CMM is stationary, the head moves to take a measurement point. The rapid rotary motion of the PH20 head allows measurement points to be taken faster and with improved accuracy, repeatability and dramatic time savings.
- 5-axis provides increased feature access with infinite probe angles: Infinite positioning guarantees optimal feature access, minimizing stylus changes, thereby improving usability over fixed-angled probe heads. Five-axis motion allows larger part access on the CMM by minimizing space required around the part for probe orientation.
Guideway Material Lowers Cost of Large-volume Gantry CMMs
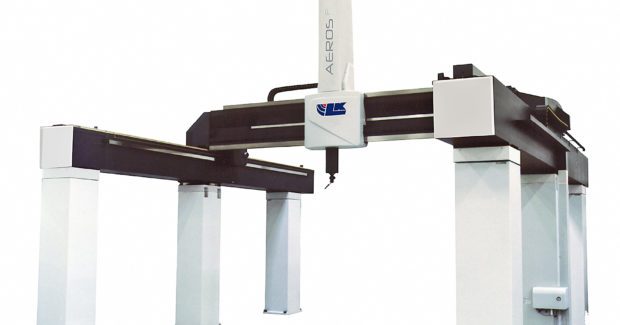
Coordinate measuring machine (CMM) manufacturer LK Metrology (Hudson Heights, MI) has introduced a third series of large-capacity models to sit alongside its established bridge-type machines and very-large-scale gantry-type machines. Using the latest innovations in aluminum and steel CMM guideway technology, the new AEROS, AEROS S and AEROS P gantry-type CMMs, 40 models in total, lower the capital cost of such equipment. With measuring volumes up to 8.0 x 3.5 x 2.5 meters, they allow a broader spectrum of manufacturers in various industries.
Unlike traditional bridge CMMs, the AEROS main structure of support pillars and longitudinal guideways remains static, with only the gantry beam assembly moving during measurement. The open design is extremely adaptable, providing full access to the work area during loading and unloading of parts. It is particularly well suited to smart factories with autonomous guided carts and manually operated wheeled or rail-type material handling systems.
For consistent accuracy and dimensional stability, innovative design features have been incorporated into the AEROS range to minimize distortions and errors of inertia. For consistent accuracy and dimensional stability, innovative design features minimize distortions and errors of inertia. For example, the guideway support system allows the longitudinal beams to freely expand without risking distortion.
Subscribe to learn the latest in manufacturing.


