Touch Probes as a Metrology Tool for In-Process Inspection
There are three important features to look for when deciding on a touch probe for in-process use.
Posted: November 6, 2021
MEASUREMENT & INSPECTION
By Gisbert Ledvon
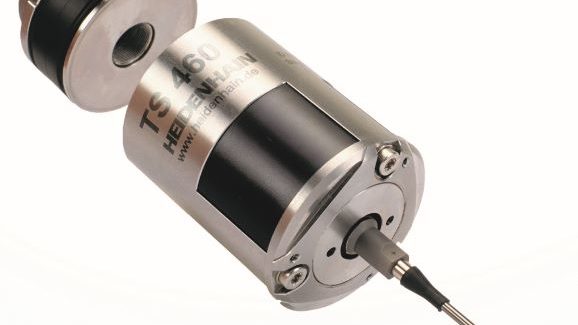
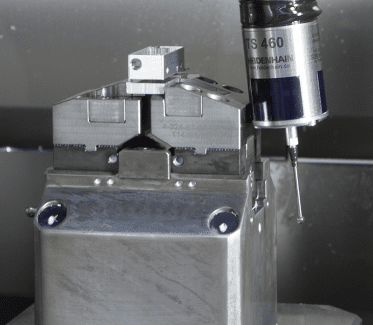
Touch probes are now widely used in the machine tool world. What is not always known are the advantages that some touch probes can provide as a metrology tool for in-process inspection within those same machine tools. When used as such, the machinist can add a higher element of accuracy to the process, more functions and eliminate subsequent inspection steps, among other benefits. All of this can save time and money in the machining process.
This is particularly true within 5-axis machining centers because it is now so easy to locate parts on a worktable or fixture by utilizing tool touch probe cycles. This is often done by aligning the parts via a flat surface or reference holes using a touch probe on the machine and allowing the 5-axis CNC to position the A-B-C axes in a way that the part plane is perfectly perpendicular to the spindle and respectively to the cutting tool.
Another common application for in-process touch probes is the calibration of the 5-axis kinematics in a machining center, assuring a precise movement, and pivoting and positioning of all the axes specifically in full 5-axis applications.
Now, because a touch probe can enable all these very precise measurements in an accurate machine tool, why not go to the next step and use the touch probe as a metrology tool for in-process inspection? Some readers may disagree believing the rule of thumb is to never inspect a part in the machine with which you machined it because you may duplicate the machine movement error (if any) and reflect these errors in the inspection measurements.
This statement is often correct, and a good quality control system often calls for an inspection of the part in the climate-controlled metrology area utilizing a CMM and other metrology-related inspection methods. I argue that every part is designed with a certain tolerance band and if you have a precision 5-axis machine tool with linear glass scales and closed loop measuring system, a machinist can accurately pre-inspect the part within most tolerance bands simply using a touch probe within that machine. This would allow the machinist to reduce inspection time and avoid possible re-machining of the part or fixture after removing it from the clamping device. This can save hours of setup time and reduces machine idle time.
Another advantage of in-process inspection is the automatic compensation of any inaccuracies of the cutting tool. Despite all of the precision that goes into tool manufacturing, radius cutters, in particular, lack a uniform geometry. The actual radius of every single tool typically exhibits distinct deviations from an ideal circular form. Research has shown that deviations of up to 0.015 mm can be expected for a standard tool. Even expensive, high-end precision cutters can have deviations in the micron range. The precision in-process touch probe inspection technique can determine deviations of the machined part in conjunction with a 3D tool compensation feature of the CNC providing powerful three-dimensional tool radius compensation. In these instances, workpiece accuracy is thereby significantly improved, especially for complex free-form surfaces. More info can be found at www.klartext-portal.com.
All these measurements cannot be reliably accomplished with an ordinary touch probe. When looking for a touch probe for in-process use, here are three important features to look for:
- Thermal barrier/insulator: The touch probe should have a thermal barrier/insulator so the heat from the spindle will not be transferred preventing the expansion of the probe length. Such flows of heat may occur particularly during longer measuring cycles if the spindle still has a high temperature from previous machining, leading to false measurements.
- Mechanical collision protection: Nobody’s perfect, meaning that mistakes sometimes happen — often completely without intention and unpredictably. This is where a touch probe with built-in collision protection is important. With complex 5-axis machining, for example, an erroneous tilting motion can never be completely excluded. When measuring workpieces in the machine, the touch probe is often impaired in such cases and even the spindle may become damaged. This is when such misfortunes are not only annoying but also very costly. Machine downtime, stoppages, costs for repair and other factors can quickly accumulate to add up to considerable sums of money. It is here that machine operators are keen to benefit from the support of intelligent technology for avoiding such errors or for at least limiting their effects.
- Reliable measuring enablers: Wear-free optical sensors within the touch probe body and a blowing device for cleaning the measuring position are two features that contribute to reliable measurement. Also, flexible data transmission is important. For example, smaller machines often benefit from infrared transmission because it provides maximum precision levels and rapid signal transmission while larger machines often use radio frequency technology with its wider range that can be used on large-scale, non-enclosed machines. The operator should be able to specify the most suitable transmission mode within the production environment according to specific circumstances.
All in all, the use of touch probes for in-process inspection is growing.
Gisbert Ledvon is the director of business development of HEIDENHAIN CORPORATION’s Machine Tool Division. For more information, contact HEIDENHAIN’s CNC control group at [email protected] or Ledvon at [email protected].


