5-Axis Vertical Machining Center (VMC) Provides Large Work Envelope Relative to Footprint
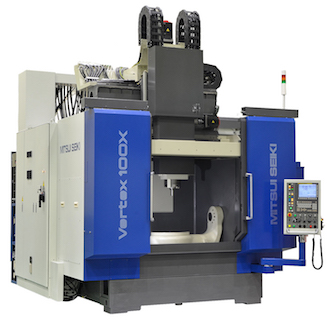
Engineered for tight-tolerance work for the mold and die, aerospace, and energy industries, Mitsui Seiki’s compact Vertex 100 provides a large workpiece capacity so operators can process a wider range of parts.
Posted: February 11, 2021
The Vertex 100 5-axis vertical machining center (VMC) from Mitsui Seiki USA Inc. (Franklin Lakes, NJ) meets the need for a compact machine that can precisely mill large parts such as blisks for aircraft engines. It produces workpieces 49.25 inches (1,250 mm) in diameter and 33 inches (850 mm) tall, but consumes just 10 feet (3 m) by 13.8 feet (4.2 m) of floor space. X-Y-Z axis strokes are 1000 mm, 900 mm, and 750 mm respectively. Maximum swing diameter is 1,480 mm.
From CAT 40 to HSK-A100 taper sizes, the machine is supplied with multiple spindle options (15,000 rpm, 25,000 rpm and 30,000 rpm). A 60-tool automatic tool changer handles maximum tool lengths of 300 mm and maximum tool diameters of 125 mm (CAT40/HSK A 63) or 160 mm (CAT 50/ HSK A 100). Larger-capacity tool changers are available.
Supported by a rigid and robust cast iron base, the machine’s tilt/rotary table provides high precision and rotation speed up to 100 rpm. The table’s C-axis motors are direct-drive; the A axis has tandem direct-drive motors.
The X and Z axes are driven by single ball screws and dual ball screws on the Y axis. The linear axes are capable of fast, 1-G acceleration and deceleration.
Cast iron bed and a solid “box-in-box” design provides superior rigidity, stiffness and agility. The geometry produces positioning accuracy in the X, Y, and Z-axes of 0.001 mm (0.000040-inch), ±6 arc seconds in A axis, and ±4 arc seconds in the C axis.
Hand-scraped guideways further maximize precision. Advanced thermal compensation system ensures size consistency, and glass scales provide minimum resolution of 0.001 mm.


