How to Minimize Post-Processing Headaches for 3D-Printed Parts
Although 3D metal printing is becoming more popular, finishing remains a challenging and arduous task. Understanding how post-processing works and how to measure results will help you optimize this crucial step.
Posted: December 2, 2020
ADDITIVE MANUFACTURING COLUMN
BY STEVE ALVITI
Although 3D metal printing is becoming more popular, finishing remains a challenging and arduous task. Understanding how post-processing works and how to measure results will help you optimize this crucial step.
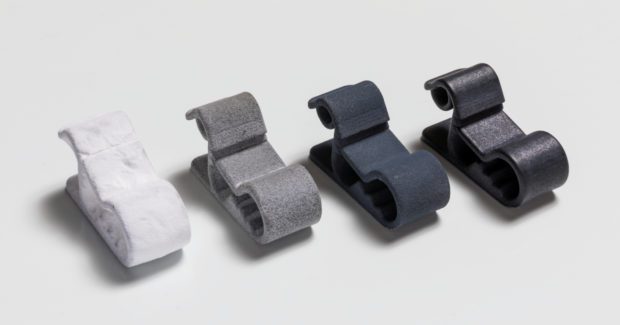
Because size and geometry greatly affect post-processing, a 3D model of the part helps narrow down machines, compounds, and media that can be used. Let’s consider a large and complex part sent to us for finishing. We’ll confer with the customer to gather background information on the part. What’s its purpose? Should the finish be cosmetic, functional, or both? Parts can be made to be shiny, matte, or coarse and processed to an Ra value. In addition, dyeing, coating, and electroplating can be done to improve the part’s look and feel.
In addition to helping us decide what technologies to consider, the answers provide vital details we need to develop the most effective post-processing operation possible. If the part isn’t fully optimized for post-processing, we suggest alternative print layouts that will expedite finishing while preserving (or improving) its cosmetic and functional components.
We also ask how many parts the customer wants to process a day and how consistent they want the process to be. In the mass-finishing world, no two parts have the same exact finish; there are always slight variations. There are bound to be a small number of defects from printing or accidental wear and tear in post-processing. What are the acceptable values for margin of error?
After all these criteria have been set, the parts are ready to be processed.
Sending a sample of acceptably finished parts also optimizes post-processing. We use contactless Zygo Corp. optical profilers to record surface data and create a 3D image of the surface, information that helps us consider how the surface can be improved.
Once that’s done, we decide what technologies to incorporate into the sample process. A sample process is determined based on the customer’s finish quality, price, and/or pure throughput needs. Machines, media, and compounds are recommended and then selected for the sample processes. Then the processes are done and metrology is taken to determine the exact effects of each one. After all of this is completed, we discuss the results and determine how to move forward.
Additional equipment should also be considered to preserve the life of machinery and media to lower maintenance costs. More sample processes can be made and manufacturer specifications can be changed to further improve or create a more realistic finish.


