90-Year-Old High Precision Machine Retires with Prestige
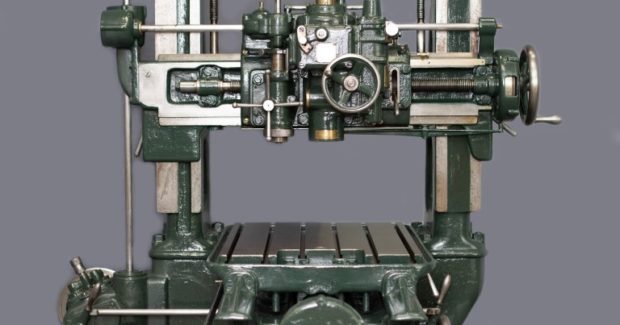
After serving at an East Coast GE plant since 1928 plus another decade on the West Coast, an SIP high precision machine has retired with honors and is on display at Starrag’s North American headquarters in Kentucky.
Posted: October 7, 2020
The year was 1928, the height of the Roaring Twenties, and the U.S. was experiencing economic prosperity. It was a decade when people defied Prohibition and immersed themselves in jazz, trendy flapper dresses, and the Charleston.
It was also the year a very special measuring precision optics machine had arrived on a ship from Europe. Its new home was the General Electric plant in Lynn, Mass., 14 miles northeast of Boston. It was the SIP MP4 machine, with serial number 88.
Societe Genevoise d’instruments de Physiques, or SIP, was a Swiss-based manufacturer of products and instruments for physics and optics that was acquired by Starrag in 2006. In the early 1900s, the engineers at SIP built a wide range of machinery, including refrigeration compressors, telescope mounts, and other scientific instruments.
All SIP products had three common elements: precision, quality and specialization. The company’s fundamental principle was “above all, aim at precision of quality and work. “
The first machine tools built by SIP were thread grinding machines, beginning in 1908. The first SIP industrial machine tool was produced in 1921. Although SIP had little experience in jig boring machine tools, the MP4 evolved from “machine à pointer” or a machine with great precision. It had a 20- by 24-inch (500 x 600 mm) worktable and was the first SIP machine that could locate and bore a hole with unparalleled precision. The MP4 was manufactured from 1921-’29.
The SIP MP4, serial number 88, has a storied past. After its time at General Electric, it traversed the country in 2009 when Robert Mathews, founder and president of R. Mathews Optical Works, Inc., located in Poulsbo, Wash., acquired the machine from a friend in Massachusetts. Prior to his acquisition, he contacted Starrag to ask questions about its origin, capabilities and usefulness in today’s times.
Refurbished and Still Reliable
Mathews Optical Works was founded in 1978 with the idea of manufacturing small quantity, specialized optical components. The company quickly became a recognized source for making optics that frequently were “out of the box” designs and difficult to manufacture. R. Mathews Optical Works has established a long-standing tradition and reputation for being able to take a design from prototype to production with consistency and quality for the past four decades.
“At the time, my company was being asked to manufacture larger (up to 12 inch (300 mm) in diameter) aspheric lenses and mirrors for the commercial and aerospace industry. Unfortunately, we were unable to measure with any accuracy anything over 8 inches (200 mm),” Mathews said in a recent written interview about the SIP MP4. “We needed something that we could easily retrofit and get the measurement accuracy that our customers required. Used CMM equipment was somewhat affordable but questionable as to their history and expensive to work on.”
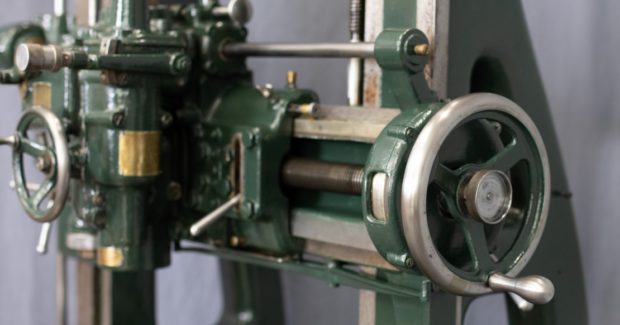
Upon receiving the SIP MP4, Mathews renovated it to get it back into working condition. He soon realized it was worth the time and effort.
“We fitted the spindle with a high-precision Heidenhain electronic probe with a 2.3-inch (60 mm) travel and ran the table through its entire travel in X and Y with an error of less than 0.0008 inch (0.002 mm) in both directions,” said Mathews. “Further tests found that the original compensated lead screws provided positional accuracy of 0.0008 inch (0.002 mm). It was then I knew I was onto something with this machine.”
After cleaning, priming, painting and complete lubrication, Mathews’ team ran it through its ultimate test: using a master glass convex spherical surface manufactured and tested interferometrically to 1/4 wave accuracy and 8 inch (200 mm) diameter; this was centered on the machine using a precision rotary table. It was then measured on the MP4 in four different positions and the volumetric error was found to be 0004 – 0.0008 inch (0.001 – 0.002 mm).
In subsequent use on actual customers’ parts, this accuracy enabled them to fabricate the parts close enough in the grinding stage to be able to polish and optically test the components to completion.
“In later years, the machine was used less and less so I freed up the frozen spindle and brought the machine back to its original operating condition,” Mathews said. “For all the years that I had the machine and used it for measuring precision optics, it never failed to amaze me the accuracy built into this machine from 1928 using the methods of the time.”
In 2019, instead of discarding the machine, Mathews offered it to Starrag, a manufacturer of high-precision machine tools for milling, turning, boring and grinding workpieces of metallic, composite and ceramic materials.
The SIP MP4, serial number 88, is now home; showcased at Starrag’s North American headquarters in Hebron, Ky.
Now that’s the bee’s knees!


