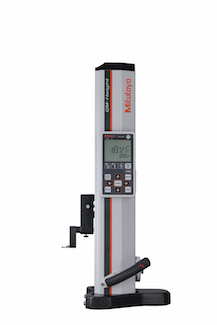
High-Performance Height Gauge
Mitutoyo America Corp.’s QM-Height Series measures height, height difference (step), inside/outside widths, inside/outside diameters, circle pitch, and free-form surface max/min heights to ±(2.4+2.1L/600) μm. Simple-to-use control panel enables most measurements to be made with one keystroke.
Posted: March 3, 2020
Mitutoyo America Corp.’s (Aurora, IL) QM-Height Series measures height, height difference (step), inside/outside width, inside/outside diameter, circle pitch, and free-form surface max/min height to ±(2.4+2.1L/600) μm accuracy (scanning stroke is approximately 1 mm above and below measurement start point). A built-in pneumatic flotation system enables smooth movement over a surface plate.
Two subdisplay modes display the value from previous measurements or zero/origin point. Origin points can also be set from hole centers. Other features:
- LEDs indicate tolerance judgment status with green for GO, red for +NG, and orange for -NG. Status is also indicated by corresponding symbols on the display.
- Proprietary mechanism and firmware enable scanning of inside/outside diameter, max/min height, and height difference using a standard probe.
- Electromagnetic induction-type ABSOLUTE encoder maintains the origin. Except when there’s a considerable environmental change, origin doesn’t need to be set after turning on the power.
- D2 digimatic and USB ports are standard. Optional U-WAVE-T wireless communication system instantly transmits data to Excel or SPC software on a PC, increasing reliability by minimizing manual input errors.
- 1,200 hours of continuous use with four AA batteries is an improvement from 300 hours.
- Air-suspension. Pressing a button on the grip activates the internal air pump. The base rises on a cushion of air and is able to be moved smoothly over the surface plate.
Mitutoyo America Corp., 965 Corporate Blvd., Aurora, IL 60502, 630-820-9666; fax: 630-820-2614, [email protected], www.mitutoyo.com.


