Bringing Flexibility to 100% Inspection of Precision Turned Parts
A Michigan automotive component supplier finds the ideal tool for quickly and confidently ensuring 600 active parts meet zero-defects requirements. Two Resec Systems ShadowGage Sorters paid for themselves within six months.
Posted: March 25, 2020
Parts for the automotive, aerospace, medical, and electronics industries must be increasingly precise to meet the tolerances required for automated assembly. The automotive market, for example, requires zero defects. As a result, more job shops are looking to implement 100% inspection and sorting procedures, commensurate with Six Sigma standards.
There’s just one glitch. Job shops make a wide variety of part types and sizes in production runs large and small. Automated 100% inspection and sorting equipment is typically custom-built for a specific part and therefore not easily adaptable for others. Manually loaded inspection equipment is more flexible; but is slow, expensive, and opens the door to human error.
Shops need alternatives that run a variety of parts and allow for quick changeover as needed.
“We run 600 active parts that are all uniquely designed for a customer-specific application, so we need the ability to rapidly and flexibly switch over to inspect other parts and part families,” says Stephen Kaspari, vice president of Warren Screw Products Inc. in Warren, Mich., which makes turned, broach, machined, and assembled components for appliance, commercial, heavy truck, agriculture, and military customers as well as the automotive industry.
Variations in turning equipment and raw material can result in out-of-tolerance product. Manual end-of-the-line inspection of thread presence or pitch diameter that reaches 80% effectiveness is approximately Sigma level 2.5, not the zero defects required to meet automotive industry standards.
“We needed to quickly inspect turned parts that could share 10 features but have a different diameter, neck length, or thread size,” says Kaspari.
Flexible, Accurate 100% Inspection
Warren Screw Products wanted flexible, high-speed inspection with accuracy up to 0.0001-inch, but wasn’t satisfied with traditional techniques. Although the company was using a mechanical sorting system, achieving tighter tolerances was necessary to get as close to zero defects as possible.
Then the company found the ShadowGage Sorter from Resec Systems LLC, a Bergenfield, N.J.-based manufacturer of automated 100% inspection sorting systems for small turned parts.
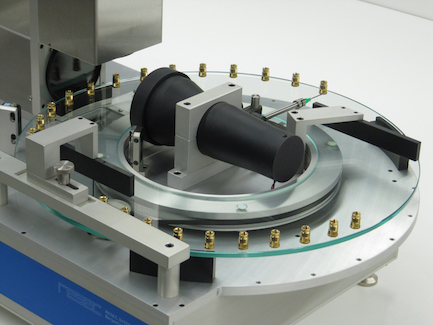
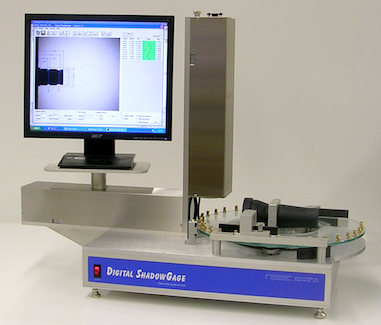
The sorter uses a rotating glass platen to transport, align, measure, and sort the parts. Precision optics and a high-speed LED strobed lamp are used to obtain a gage-quality image of the moving parts. The part’s dimensions are extracted from the image in a fraction of a second and displayed on a monitor directly over the image. The monitor shows the actual measurements as well as the tolerances.
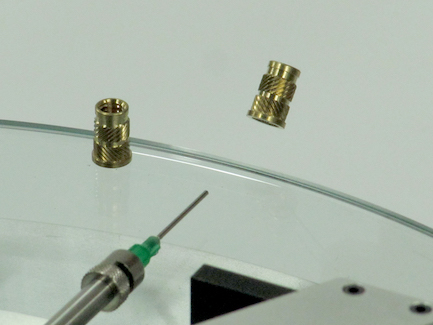
If all dimensions are within specified tolerances, the part is ejected from the platen by a precisely timed air pulse, which places it into a “pass” bin. The rejects remain on the platen and are mechanically forced into a “fail” bin. Each part’s measurements are stored in a file and can be retrieved by most statistical process control (SPC) programs or Microsoft Excel.
Inspection of all external part dimensions is possible to an accuracy of ±0.0001 inches at a rate of up to 7,200 parts per hour. The sorter can easily be configured to inspect different parts.
“Almost every part we run off our screw machines goes to end-of-line inspection equipment like this sorter to inspect for out-of-tolerance pieces,” says Kaspari. “By switching to 100% inspection with more flexible equipment, we can run parts manually for as few as 50 pieces or automatically inspect and sort more than a million at a time.
“Our sigma has increased to meet the tightest tolerances, which has helped us win bids as well.”
Six-Month ROI on Two Machines
Kaspari estimates one machine does the work of 10 employees to 15 employees. As a result, the equipment had a quick return on investment.
“We save tens of thousands of dollars annually in labor, so we were able to pay off the machines in less than six months,” says Kaspari.
The sorter is offered in two configurations. Warren Screw Products has one of each running 20 hours a day six days a week.
Flat platen sorters are for parts that have a flat end and aren’t too long, so they can stand on their head.
Tilted platen sorters are for longer parts or those without a flat head. The parts lie “tilted” on their sides on the platen and the unit adjusts the camera angle to take the measurement.
With either system, measurements of each part can be saved as an inspection program for the part and easily recalled at any time.
“We probably have 30 different parts with O-rings, and we have to know the O-ring is correctly installed, in the correct location, with only one installed on each part,” says Kaspari. “For those, we’ve had a very high level of success using the equipment to get to zero defects.”
ShadowGage sorters can be loaded manually or by using an automated bulk feed system such as vibratory feeder or conveyor. In manual mode, parts are placed on the transport by hand and the sorter does the rest.
For further flexibility, the software is used to create and edit inspection programs, set operational parameters, and calibrate equipment. A screen displays the part’s image with the overlaid measurements, and inspection programs are created directly over the interactive image.
Software tools perform various types of measurements, which are typically applied to determine part diameters and lengths, chamfer measurements, corner radius, angle measurements, circles and arcs, and threads. The tools can be clicked and dragged anywhere over the part’s outline. Measurements are displayed on screen in a familiar drawing format.
After mastering simple programming procedures, it typically takes about 30 seconds to program one measurement. Therefore, if a part requires 10 measurements, it will take about 300 seconds – or 5 minutes – to create an inspection program.
“Once you learn the basics, the software tools easy to apply to just about anything,” says Kaspari. “You pick a tool and drag it over a feature like length or diameter, so it’s pretty intuitive and easy to switch from one part to another.”
Warren Screw Products typically measures seven features to 20 features in this way, usually involving lengths, diameters, and thread pitch.


