Multisensor Metrology Speeds Automotive Component Inspection
The Hungarian automotive control system manufacturer Continental processes 1,500 inspection reports every year. Cycle times are twice as fast with a LK Metrology ALTERA 8.7.6 coordinate measuring machine (CMMs) that has a laser scanner and a touch probe.
Posted: January 30, 2020
Renowned for expertise in driving safety, the Hungarian automotive control system manufacturer Continental produces electronic and hydraulic brake and chassis control systems, wheel- and engine-speed sensors, airbag electronics, and electronic air suspension systems.
The company’s measurement laboratory plays a pivotal role in the ensuring products won’t compromise driver safety. Feature and surface inspection, linear dimension measurements, and geometric dimensioning and tolerancing (GD&T) analysis monitor production quality and assist in new product development.
A coordinate measuring machine (CMM) with touch probes was generating most of the information for 1,600 inspection reports, each consisting of around 20 measured parts, every year. Not only was this methodology too slow, the software didn’t meet company standards for automation and GD&T. With so many measurements to process, the machine couldn’t keep up with throughput, let alone provide the desired level of insight.
Continental’s goal was to cut inspection cycle times in half. Before beginning the search for a new solution, the laboratory outlined its desire to use multisensor technology in the reorganization of facilities. After consulting several vendors, the lab decided to install two ALTERA 8.7.6 CMMs from LK Metrology (Brighton, MI).
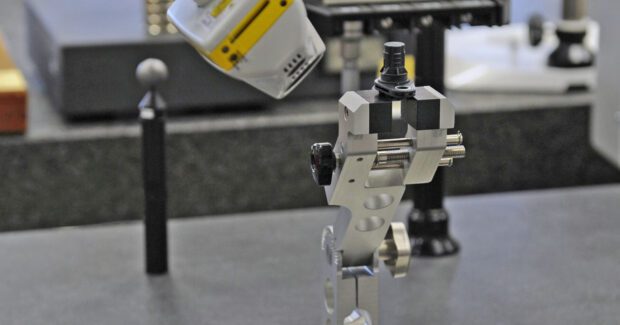
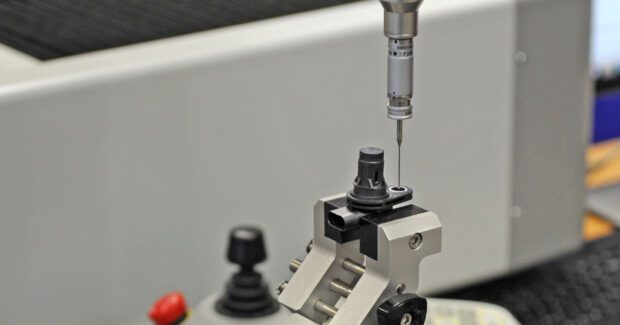
The machine has a Nikon LC15Dx digital laser scanner and Renishaw TP200 tactile measuring probe. An ACR3 change rack controlled by LK Metrology’s CAMIO acquisition-and-processing software ensures smooth, automated exchange between the tactile and non-contact probes.
All data is stored and available for reprocessing or further analysis, making the new inspection system an important tool for handling potential customer claims. By increasing insight into critical dimensions, cavities, and functional features of parts, the new inspection process enables operators to take corrective action more quickly.
“The multisensor CMM allows almost all measurements types to be completed on one machine, whereas previously we needed to use multiple inspection facilities such as tactile probe, microscope, projector and conturograph,” says technician Peter Somogyi.
“The graphical reporting is quick and easy to understand,” adds Quality Engineer Tamas Brunner. “Parts need to comply to many different tolerances and the reports provide clear information.”
The new equipment has caught the attention of Continental’s Molding Competence Centre, which is evaluating how optical inspection can speed pre-production and development cycles.
LK Metrology, 12701 Grand River Road, Brighton, MI 48116, 810-263-6100, www.lkmetrology.com.
Sidebar: COMPACT MULTISENSOR CMMs
Manufacturers that serve aerospace, automotive, medical, and other demanding industries can speed time to market with LK Metrology’s ALTERAC ceramic-bridge coordinate measuring machines (CMMs). The line of flexible-configuration machines provides three measurement methodologies in a compact footprint.
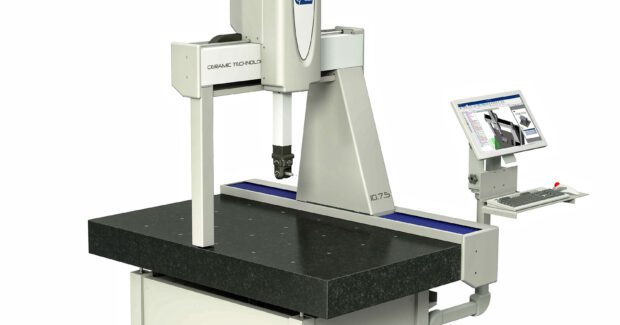
Above: ALTERAC CMMs from LK Metrology provide high accuracy and repeatability in a small footprint. Available in three sizes: 7.7.5, 10.7.5, and 10.7.7 with X,Y,Z axis movements of 700 x 650 x 500 mm; 1,000 x 650 x 500 mm; and 1,000 x 650 x 650 mm, respectively.
Measurements taken with a touch-trigger probe at a series of points is increasingly being augmented by continuous-contact probing (analogue scanning) and laser scanning to enable high-speed collection of data on complex freeform surfaces. The ALTERAC from LK Metrology (Brighton, MI) can deploy all three sensor types, boosting throughput to avoid bottlenecks in the metrology department, providing comprehensive awareness of component conformance, and supplementing engineering activities to speed time to market for new products. Renishaw encoders with 0.05-micron (μm) resolution optical scales for high volumetric accuracy ensure outstanding metrology and resist contaminant ingress.
The ALTERAC (the “c” stands for “compact”) is a smaller version of the ALTERAS coordinate measuring machine (CMM). Like the company’s other machines, the moving bridge and spindle are ceramic instead of aluminum. It’s three times stiffer than aluminum but only one-third heavier by volume, resulting in higher machine acceleration and speed. Ceramic doesn’t stress-relieve like aluminum, leading to better long-term dimensional stability. Ceramic’s thermal expansion coefficient is like granite but four times lower than aluminum’s, making the structure highly resilient to thermal movement. Ceramic is three times harder than aluminum, so is more resistant to abrasive wear and indentation.
Unlike the ALTERAS, though, the control may be standalone or integrated into the base with a keyboard on an arm at the side, giving the customer a choice that best suits the installation site and facilitates relocation.
Pneumatic mounts isolate the machine from nearby sources of low-frequency vibration such as large machinery. Guideways with pre-loaded wraparound air bearings are 3.5 times stiffer than standard air bearings. They run with a reduced air film thickness for low energy consumption and give repeatable results even at fast axis speeds. Friction drives provide smooth motion and exact positioning at continuously varying speeds, as well as zero backlash, overload protection, and low maintenance costs.
LK’s CAMIO8 DMIS-based multisensor software enables programming and measurement based on 3D CAD data and comprehensive reporting.
LK Metrology, 12701 Grand River Road, Brighton, MI 48116, 810-263-6100, www.lkmetrology.com.


