Integrated, Automated Measuring Cell for At-Line Inspection
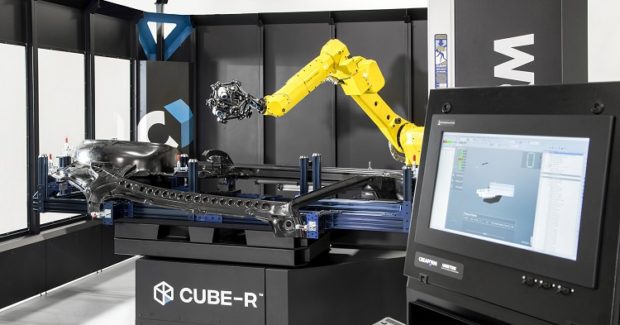
The CUBE-R from Creaform uses the MetraSCAN 3D-R metrology scanner to combine efficiency, speed and reliability with 3D digitizing and dimensional measurement of parts ranging from 1 m to 3 m, with metrology-grade volumetric accuracy in real-life shop floor conditions.
Posted: July 25, 2018
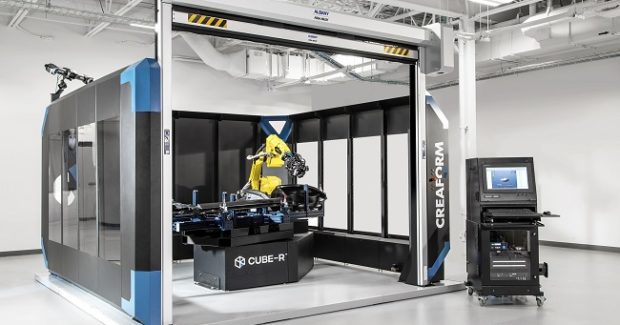
In Booth E-135642, Creaform (Lévis, QC) will showcase the CUBE-R™, a new generation of complete turnkey automated dimensional inspection system. This optical 3D measuring machine capitalizes on the MetraSCAN 3D-R™ metrology scanner and combines efficiency and reliability of robotization in an automated industrial measuring cell. The CUBE-R extends the 3D digitizing and inspection capabilities of the MetraSCAN 3D for the dimensional measurement of parts ranging from 1 m to 3 m with metrology-grade volumetric accuracy in real-life shop floor conditions. Unlike conventional systems, the CUBE-R delivers both speed and volumetric accuracy. In addition, it ensures a significant increase in productivity. This system offers a realistic and comprehensive alternative to coordinate measuring machines (CMM) and other robot-mounted, structured-light 3D scanners. Key features and benefits include:
- High productivity: Performs effective inspections on several hundred parts a day (even on dark or reflective parts with complex geometry).
- Multitasking: Maximizes production cycle and throughput by offering a simultaneous operation of data acquisition and analysis in a continuous and uninterrupted measurement flow.
- Automatic field calibration procedure: No accuracy drift over time and continuous operation.
- Minimum operator training: Easy-to-use and short learning curve to keep up with fast production pace.
- Complete turnkey system: No integration required, fully enclosed and shop floor ready.
- Smaller factory footprint: A complete 4.1 m x 4.1 m x 3.1 m turnkey system with a flexible shop-floor configuration.
“Quality control managers are looking for integrated systems that enable the detection of assembly problems earlier in the manufacturing process, all while reducing waste and down time to ensure better productivity and higher product quality,” says Jérôme-Alexandre Lavoie, a product manager at Creaform. “The CUBE-R was designed with that in mind. It is the latest addition to our R-Series automated inspection systems that also include technology integration for clients looking for customized dimensional measurement solutions.”
Creaform, 5825 rue St-Georges, Levis, QC G6V 4L2, 418-833-4446, www.creaform3d.com.


