Advanced Measurement Systems for the Shop Floor or the Lab
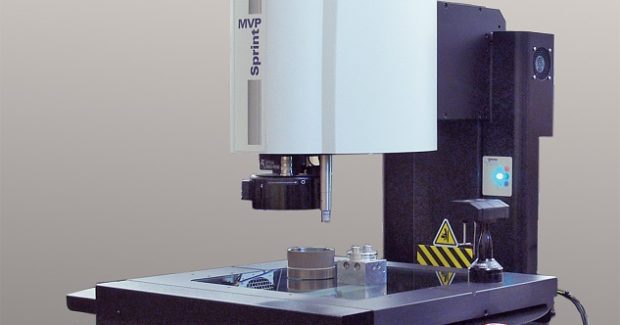
The 3-axis SprintMVP benchtop measurement system from RAM Optical Instrumentation is one of several inspection systems and software from QVI that help to reduce inspection cycles and increase accuracy on a wide range of complex part configurations.
Posted: August 12, 2017
In Booth 1118, RAM (RAM Optical Instrumentation), a division of Quality Vision International (QVI®; Rochester, NY), will display a family member of their SprintMVP™ measurement systems that set a high standard for 3-axis dimensional measurement capability. With strong granite construction, precision ball-screw motorized stages and versatile optics, SprintMVP can easily handle a wide range of measurement challenges. These benchtop machines are available in three sizes, with joystick-controlled stages providing XYZ measurement volumes ranging from 200 mm x 150 mm x 150 mm to 300 mm x 300 mm x 150 mm. Motorized zoom optics provide a wide range of available magnifications to image and measure large or small parts. A digital megapixel metrology camera couples with the superior optics to produce clear and crisp images.
Vector lighting provides illumination from various oblique angles to help highlight part surface features and details, making it easier to image and measure them. Optional laser and touch probe sensors can be added to make SprintMVP a true high-performance multisensor metrology system. Additionally, SprintMVP can be configured with optional rotary indexers, adding the capability to rotate parts to measure features on multiple part surfaces. All of these systems are equipped with Measure-X®, a highly popular metrology software. While already one of QVI’s most versatile vision measurement platforms, SprintMVP now offers enhanced Z-axis travel.
As an option, SprintMVP may be equipped with the universal Z-slide, yielding an additional 100 mm of Z-axis travel that translates into a sizeable 66 percent increase in measurement volume. With its robust, precision-ball-screw-design and 100 mm extended travel universal Z slide, SprintMVP brings high quality dimensional measurement to one of the most cost-effective vision measurement systems in the industry.
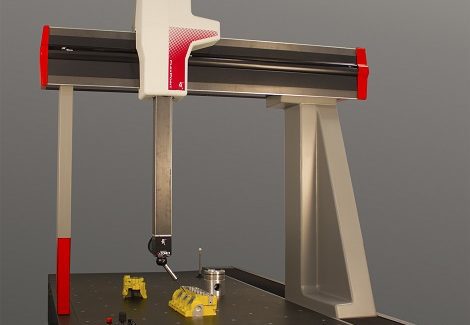
Also on display will be OGP® (Optical Gaging Products), another division of QVI that will introduce their groundbreaking line of FlexPoint flexible multisensor coordinate measuring systems to the North American metrology marketplace. FlexPoint represents a new generation of large format multisensor coordinate measuring systems that provide a unique blend of precision, flexibility, and speed to solve a wide variety of dimensional measurement problems for large format parts: floor model systems are available in nine different configurations with XYZ measurement volumes from 700 mm x 700 mm x 600 mm to 1,200 mm x 3,000 mm x 1,000 mm, and three different variations of benchtop systems are also available.
FlexPoint uses its multisensor advantage to tackle the toughest measurement challenges. These true multisensor systems support a range of tactile and non-contact sensors, including TP20/TP200 touch trigger probes, the SP25 continuous contact scanning touch probe, lasers, white light sensors, and a unique QVI video sensor. On floor model systems, a VersaFlex™ multisensor head offers up to three simultaneously available sensors on an articulating probe head. With several sensors available at once, there is no down time while individual sensors are exchanged from a change rack, and no need to recalibrate each time a sensor is used. Benchtop FlexPoint systems may be configured with TP20/TP200 touch trigger probes or SP25 scanning touch probe.
All FlexPoint systems are powered by ZONE3® 3D CAD-based metrology software that provides complete flexibility for multisensor measurements, with or without a CAD model. An entirely graphical user interface, visual validation for every step, and graphical reporting make ZONE3 the easiest and most intuitive 3D metrology software available. FlexPoint systems take advantage of high quality construction. Utilizing a stable transport design and carefully selected materials, rigid body members, air bearings on all measurement axes, and active temperature compensation, these systems are equally at home in the metrology lab or on the shop floor. Unique and patented design features enable a large measuring volume within a relatively compact footprint. Factory volumetric calibration, and in-the-field machine accuracy verification performed according to ISO 10360-2:2009 minimize the system’s measurement uncertainty.
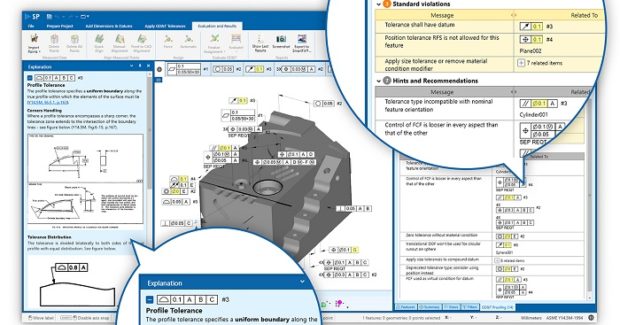
Also on display will be KOTEM, a division of QVI that announces three new additions to their EVOLVE™ software family: EVOLVE Design, EVOLVE SPC, and EVOLVE DataPreparation applications that enhance the communication of geometric dimensioning and tolerancing (GD&T) throughout the enterprise manufacturing process. Most product designers use CAD to create perfect parts, but they also provide tolerances for manufacturing to build those parts within design specifications. The transition from the perfect world of CAD to the real world of the shop floor has always been a challenge.
During the design process, product designers typically use their own interpretation of GD&T standards, but before the actual parts can be built, manufacturing must revisit and reinterpret those GD&T standards (again). To complicate matters further, quality must inspect the production parts to ensure that they are built to specifications and, in doing so, they revisit the GD&T standards for at least a third time. All of this reinterpreting of GD&T standards creates opportunities for errors and uncertainties to creep into the process and miss the intent of the original design, costing time and money. To address this, the three new KOTEM applications all use the same GD&T engine throughout the entire process, from design to manufacturing to quality to ensure consistent interpretation of GD&T standards.
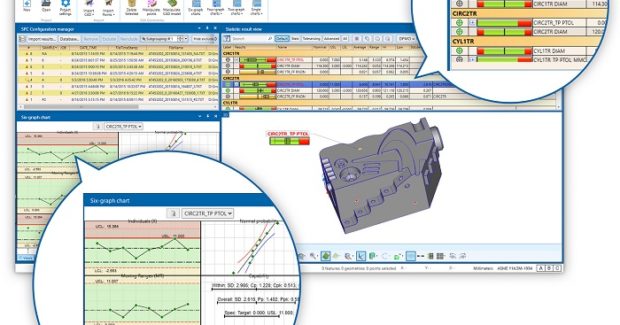
EVOLVE Design supplies the GD&T Proofing needed by product designers, providing best practices guidance while helping the designer maintain adherence to GD&T standards. EVOLVE Design uses the same GD&T engine used in SmartProfile®, a highly successful application used to evaluate part compliance with GD&T tolerances that is relied upon by quality organizations worldwide. EVOLVE SPC provides state-of-the-art statistical process control tools to manage the manufacturing process. Integration of 3D CAD model, data and graphics allows clear visualization and correlates measured points to the location on the CAD model and the same points on a control chart or table. This is especially helpful when reviewing and analyzing many parts and/or measured points. A full database implementation allows long-term trend studies and manufacturing analysis of potential problem areas. Additionally, non-CAD data points can be imported and converted to model-based data points.
EVOLVE DataPreparation acts as a bridge between advanced measurement systems that generate a large number of measured points, preparing these points to be processed and analyzed for GD&T evaluation by SmartProfile so that users use the best measurement technologies options to help them maximize speed while improving accurate results. With these three new additions to the EVOLVE family, KOTEM now offers an end-to-end solution for product tolerancing needs from proofing to evaluation and compliance, all critical to manufacturing success.
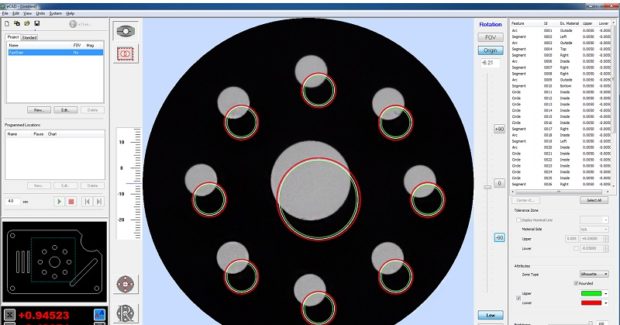
Also on display will CCP (Certified Comparator Products), a division of QVI that introduces a way to eliminate traditional comparator overlay templates with their new vCAD™ virtual chart gage software. When present on a c-vision™ Digital Video Contour Projector®, vCAD offers a method to digitally compare projected part images to an imported CAD file overlay of that part. Users can now align edges, compare dimensions, and see the projected part image matched with the virtual CAD overlay. The simplicity, ease of use, and screen resolution provided by vCAD on a digital comparator far exceeds that offered by traditional overlay templates used on an analog comparator.
vCAD displays charts and grids for manual reference, along with color coordinated tolerance bands to help the user determine if a part is within tolerance. Changing magnification on the digital comparator automatically rescales the vCAD overlay to the selected magnification. Once the vCAD overlay and the part image are aligned, they can be coupled together – this locks the part image and the virtual overlay together, and they will maintain alignment with each other even if the stage is moved or the part is rotated. The stage can be moved manually, or a programmed location sequence can be created to automatically survey and measure the part. It is not necessary for an entire part to fit on the comparator screen, because the virtual chart will follow the part movement. This makes vCAD perfect for use with smaller screens or at higher magnifications.
vCAD tolerance bands can be defined for size, color, and type, with global settings and editing capabilities. Tolerance bands may be as small as a few thousandths of an inch, and they exhibit no line widths to visually confuse users. vCAD virtual chart gages eliminate the time and expense of maintaining up to date traditional overlay charts, as well as the physical storage space demanded by them. With vCAD, the most recent CAD files can be used, so the user always inspects and measures using the latest available engineering information.
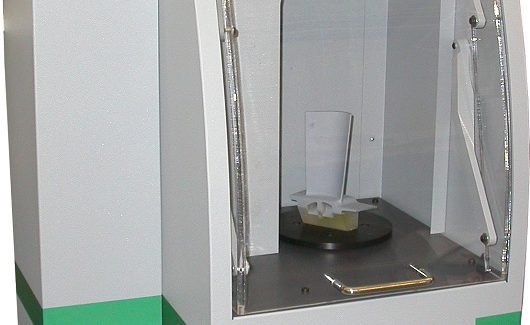
Organizations must often balance their quality inspection processes with the need for speed, especially when the part has multiple features or compound curves. Complex parts such as metal castings and stampings can be time consuming to measure and inspect using traditional methods such as touch probing, calipers, or gauges. When speed is important and many points need to be measured, the Ai310 automated 3D scanner on display from ShapeGrabber, a wholly-owned subsidiary of QVI, can be the answer. Rather than cutting corners or simply not being able to inspect some parts or points, manufacturers can use the Ai310 automated 3D scanner for rapid, thorough quality inspection. Within minutes, it automatically captures a dense “point cloud” of millions of data points that represent the entire surface area of the part. With this data, manufacturers can:
- Reduce inspection time.
- Quickly troubleshoot fit problems.
- Measure whole parts rather than just a few points.
- Minimize equipment downtime and make rapid Go/No Go decisions.
- Detect die wear.
The Ai310 scanner makes quick work of quality inspection. It reduces the inspection time required while generating more thorough results as well as automated reports. This scanner can enhance 100 percent inspection, statistical process control (SPC), and production part approval processes (PPAP). No special skills are required to conduct the scan, and the scanned data can be quickly compared to spec via direct comparison to CAD models. The data can also be used to generate visual reports that show deficiencies at a glance.
Quality Vision International, 850 Hudson Avenue, Rochester, NY 14621, 585-758-1300, www.qvii.com.


