Tips for Successful Aluminum MIG Welding Repairs
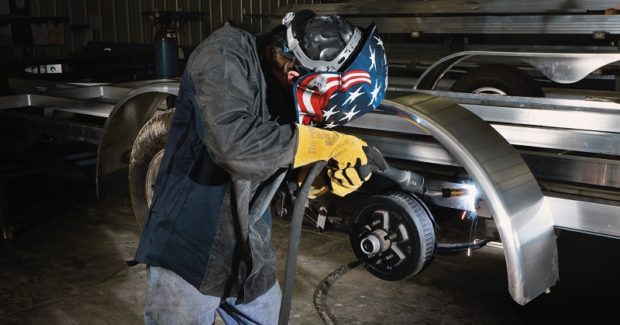
With its low melting point, the presence of an oxide layer on its surface, prone to burn-through with a difficult-to-control weld pool, aluminum can be somewhat tricky. Here are some insights that will provide you with the best course of action to take for making a repair.
Posted: July 1, 2017
Aluminum can be somewhat tricky to weld due to its low melting point and the presence of an oxide layer on its surface. It’s particularly prone to burn-through and can have a difficult-to-control weld pool. Additional challenges can be presented when welding an aluminum part that has already been in service, which can result in dirty surface conditions or hard-to-reach weld joints. When approaching an aluminum welding repair, assessing part condition is a key first step. It’s also important to determine which welding process is most appropriate, and to employ proper cleaning and techniques.
CAN IT BE REPAIRED?
Sometimes a part is simply beyond repair or it will be too time consuming. Before proceeding, assess whether the labor of a repair will cost more than replacement with a new part. Parts that can be quickly and easily fixed are good candidates for repair, as are expensive parts that would have a high replacement cost. If you determine a part can be repaired, the next step is choosing the welding process to complete the job. For parts less than 1/8 in thick, TIG welding is the best choice to help minimize heat input and the opportunity for burn-through or distortion. TIG welding is also a good choice for repairs on cast aluminum parts or for repairing parts with limited access, as a TIG torch is smaller and easier to maneuver into a constricted area.
However, because TIG welding is a slower process, MIG welding can be a good choice to expedite repair. MIG welding provides advantages of speed, precision, low spatter levels and ease of training.
MAKING REPAIRS WITH PULSED MIG
Pulsed MIG welding can be especially beneficial when welding aluminum repairs. Like TIG welding, Pulsed MIG offers lower heat input and greater control over the weld pool, compared to a conventional constant voltage (CV) MIG process. Pulsed MIG is a modified spray transfer process in which the power source switches between a high peak current and a low background current between 30 times to 400 times per second. During this switch, the peak current pinches off a droplet of wire and propels it to the weld joint. At the same time, the background current maintains the arc but has such a low heat input that metal transfer can’t occur. Pulsed MIG offers these advantages for fast and accurate aluminum repair:
- It can be used to weld thick and thin parts.
- It can be used in all positions.
- It minimizes burn-through and distortion on thinner parts.
- It offers high deposition rates and faster travel speeds for increased productivity.
- It offers good control over arc starts and stops.
PREPARING ALUMINUM PARTS
Proper pre-cleaning and joint preparation are important steps in repairing aluminum parts. Aluminum is very sensitive to dirt, oil, grease and other contaminants, all of which can lead to defects like porosity. The opportunity for defects is especially prevalent when an aluminum part has been damaged, since contaminants can easily become embedded in cracks in the material. Use an aluminum cleaner and a soft, clean cloth to remove any contaminants from the joint. If you’re working on a thicker section, grind an angle (or bevel) through the damaged part. A V-groove works well. If possible, grind out an identical V-groove on the opposite side, as welding on both sides adds strength and reduces opportunities for additional part breakage. If it’s not possible to access both sides of a piece, simply bevel a bit deeper into the part. Finally, use a stainless steel wire brush designated for use with aluminum to remove any remaining dirt on the surface. The scrubbing action will also remove the oxide layer, making it easier to weld.
EQUIPMENT AND FILLER METAL
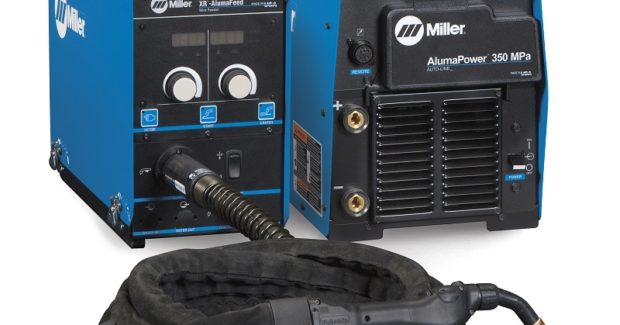
Because aluminum wire is very soft, it cannot be fed through a conventional MIG gun because the wire can become easily tangled in the drive rolls of the wire feeder, referred to as bird-nesting. At a minimum, use a spool gun, which holds a small spool or wire directly on the gun. This minimizes the distance the wire has to travel and reduces the potential for tangles. A push-pull gun paired with a push-pull wire feeder is an even better option. These guns have a motor inside to pull the wire through the liner while the feeder steadily feeds it. This offers precision wire feed speed and control, lessening the chance for wire feeding issues. No matter the gun style, use a push technique instead of dragging the gun away from the weld pool. In addition, flat is the ideal position when possible, because it’s easier to control the weld pool and offers greater operator comfort.
To select the appropriate filler metal, first identify the type of aluminum being welded and determine the operating conditions for the part. Utilize a filler metal selection chart to assess the characteristics of available wires, including crack sensitivity, strength, ductility and corrosion resistance. It’s also important to consider service temperature, color match (after anodizing) and toughness requirements, and possible post-weld heat treatment.
FINAL THOUGHTS
As with any welding process, following proper cleaning procedures, equipment usage and techniques are important for success. Always employ best welding practices during the process and consult a trusted welding distributor when in doubt about the best course of action.


