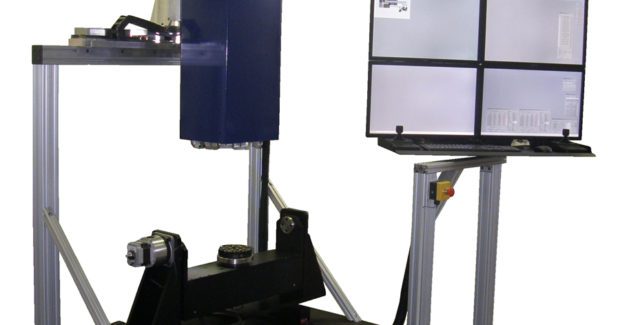
Digital Optical Comparator with Extended Travel
By automatically verifying hole presence and accurately measuring hole location and geometry, the 700 Series VisionGauge from Methods Machine Tools is ideal for inspecting EDM and laser-drilled cooling holes.
Posted: August 2, 2016
In Booth S-9119, Methods Machine Tools, Inc. (Sudbury, MA) will showcase their new extended-travel 700 Series VisionGauge Digital Comparator that is manufactured by VISIONx, Inc. (Pointe-Claire, QC). The new extended travel machine features a 24 in x 24 in x 24 in envelope and tilt and rotary axes based in a trunnion configuration that can accommodate parts weighing up to 100 lb. The system configuration is ideal for larger and heavier parts such as those found in the industrial gas turbine industry. The 700 Series VisionGauge has five axes of motion (X, Y, Z Rotary and Tilt) that enable a user to accurately view parts from all sides and is fully automated, eliminating operator-to-operator variation and potential error.
The 700 series is particularly well-suited for the inspection of EDM and laser-drilled cooling holes. It can automatically verify hole presence, as well as accurately measure hole location and geometry. It also has the ability to measure complex parts made via additive manufacturing. It supports both round and shaped holes and works equally well on both coated and uncoated parts. An ultra-bright, computer controlled multi-angle, multi-quadrant and all-LED illumination via a programmable, computer-controlled system is standard on all machines. The system has complete integrated 5-axis corrections and dynamic fixture correction, as well as full 3D mapping for maximum accuracy.
Introduced in 2014, the original 700 Series VisionGauge has a 12 in x 12 in x 12 in envelope and a tilt and rotary stage assembly that is mounted in a cantilever configuration. This is ideal for inspecting smaller, lightweight parts such as blades, vanes and heat shields in the aerospace industry. The VisionGauge has an optical system designed for an extended depth of field, providing complete clarity and focus, regardless of a part’s geometry, in addition to a very long working distance that provides enormous flexibility. The system has innovative and uniquely adaptive feature-detection software tools that accurately locate holes and slots on different surfaces, with diverse reflectivity and at various viewing angles. This is especially well-suited when dealing with burrs and splatter.
VisionGauge Digital Optical Comparators are a fully-digital drop-in replacement for traditional optical comparators. The comparators work directly with the part’s CAD data and do not require any overlays, Mylars™ or templates. Systems are Windows-based and delivered network-ready in a shop floor, convenient “rolling cart” configuration. These comparators are more accurate than traditional optical comparators and allow users to achieve a much higher throughput. They can be set up to automatically collect complete electronic documentation and device history for SPC and quality compliance purposes. They allow users to compare a part to its CAD data in real-time, fully automatically. VisionGauge Digital Optical Comparators are available in vertical and horizontal configurations and are exclusively distributed throughout North America by Methods Machine Tools.
Methods Machine Tools, Inc., 65 Union Avenue, Sudbury, MA 01776, 978-443-5388, Fax: 978-440-9405, www.methodsmachine.com.


