Cutting Through Surface Noise: Easy Cylinder Head Inspection
This high-intensity, multidirectional lighting camera technology makes easy imaging of challenging part features on machined heads to provide a clear advantage for this automotive supplier.
Posted: March 2, 2016
Vantage Corporation (Livonia, MI) is a leading provider of automatic inspection and assembly systems, designing and building a wide variety of specialty connecting rod gaging equipment, sorting devices for springs and other components, fuel injector nozzle assembly stations, cylinder bore inspection machines that measure roundness and surface profile, and more. Its proprietary RTGC32 gage and cell control software is used in conjunction with both vision and probe-based metrology systems for real-time monitoring and automation of various manufacturing processes, and is designed for easy integration to customer assembly and machining lines. This makes Vantage a one-stop shop for many of its customers, especially those where high throughput and repeatability are prerequisites for success.
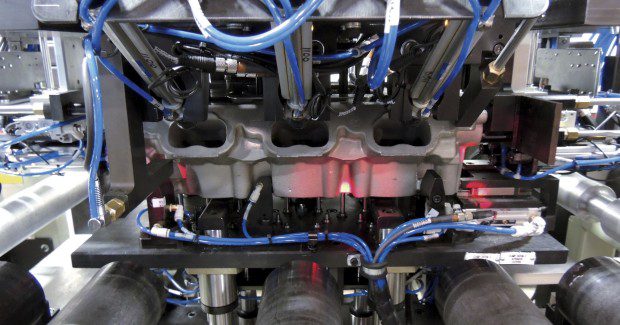
One of these is a Tier One automotive supplier with manufacturing plants in Ramos and Saltillo, Mexico. Among other products, this supplier produces cylinder heads that are marked immediately after the casting process with a dot-peened 2D matrix-style barcode for traceability. Vantage was contracted to design and build a dimensional test station for placement at the end of the cylinder head machining line, one that would use a camera to read the barcode on the side of each casting, then collate the serial number found there together with the different part measurements for upload to a central database. There was only one problem: due to the casting’s rough surface, scanning the barcode was proving difficult.
https://youtu.be/vGeW45gjv3I
“It’s tough to read anything on a casting,” says Nathan Ritter, the controls engineering manager for Vantage. “Laser marking, dot-peen, or mechanical stamp, it doesn’t really matter – the irregular surface tends to scatter light in all directions, so you can’t see much when you view it with a camera.” Ritter and the Vantage team knew from past experience that proper lighting is a necessary component of any vision system, and is key to consistent results. Until now, the best solution in these situations was to flood the area with spotlights, something that complicates the setup while driving up integration costs. The use of supplementary lighting can also compromise speed—in this case, the cycle time for the entire measuring process was less than 16 seconds, so Ritter needed a way to read the barcode quickly and without interruptions.
Rather than accept the status quo, he turned to Keyence Corporation of America (Itasca, IL) for a solution. As one of Keyence’s longtime customers, Ritter already had firsthand knowledge of their extensive product line and robust measuring technology. “We’ve used their vision systems many times on our equipment, and have integrated their laser micrometers and three-dimensional profile cameras as well. We push the use of their products with most of our systems, because we know there won’t be any phone calls later on from unhappy customers.”
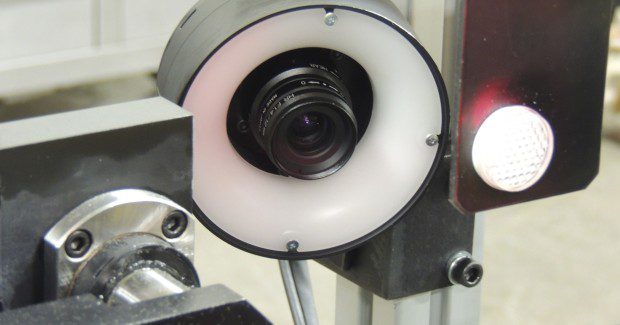
Keyence had recently introduced LumiTrax technology that combines ultra-high-speed CMOS sensors, partial illumination LED lighting, and advanced inspection algorithms to deliver an imaging solution that easily detects features, shapes, and text on even the most challenging of part surfaces. Unlike traditional imaging systems, which can be adversely affected by variations in ambient lighting and workpiece orientation, LumiTrax uses a high-intensity, multidirectional lighting source to capture up to 16 separate color or monochrome images, and then analyzes the relative brightness level at each pixel to separate irregularities from background surface patterns. The result is a system that quickly and repeatedly “sees” objects that in most cases are otherwise impossible to detect.
Ritter worked with Keyence to implement the LumiTrax system on the cylinder head line. He says this was a straightforward task, as the CVX controller and interface used on the new system is identical to other Keyence products. Ritter wasn’t disappointed with the results. The LumiTrax made short work of the peened barcode, easily distinguishing the 2D matrix from the cast surface of the part, and doing so in perhaps one-tenth of a second. “The system cuts through all the surface noise to give us exactly what we’re looking for,” he says. “We’re confident in the readings, and there was no need for any trickery with the lighting. Going forward, we’re going to use it for all our casting applications, and on any other parts where 2D imaging is a problem. This system makes it easy.”
Keyence Corporation of America, 1100 North Arlington Heights Road, Suite 210, Itasca, IL 60143, 888-539-3623, Fax: 201-930-0099, [email protected], www.keyence.com/vantage.


