

Laser Marking 101
How do you choose the appropriate laser for your marking applications? Here are several factors that must be considered and how they impact the end results.
Posted: February 26, 2016


WHY LASER MARKING?
Fabricators have a variety of methods to choose from when looking to mark parts. Laser marking yields a number of advantages compared to some of the more traditional marking methods such as inkjet printing, etching, mechanical engraving, and stamping. Most notably, they can be used for a wide array of materials, ranging from ferrous and non-ferrous metals to organic materials such as thermoplastics and elastomers. Other advantages include high marking quality and speeds, minimal effect on the material, consistent results, and no tool wear. But how do you choose the right one?
CHOOSING THE RIGHT LASER
There are several factors to consider when selecting the appropriate laser for your application. Material type, processing mode, mark quality, cycle time, and budget are the most important elements to examine. It is important to understand the options available and how they impact the end results.
The three main wavelengths used for marking lasers are infrared (1,064 nm), green (532 nm), and ultraviolet (355 nm). Infrared lasers are the most commonly used. They are intended for annealing and engraving of ferrous and non-ferrous metals, but also have the ability to foam thermoplastics. Green lasers mark precious metals at high quality, and work well for electronic and semiconductor industry applications. Thermoplastics can also be marked at this wavelength, but success is very dependent on the color pigments of the material. Ultraviolet lasers have the most success in marking thermoplastics and elastomers by way of a color change or photochemical reaction. UV lasers also have the ability to mark glass (surface and interior), and enough absorption to ablate materials, but not engrave them.
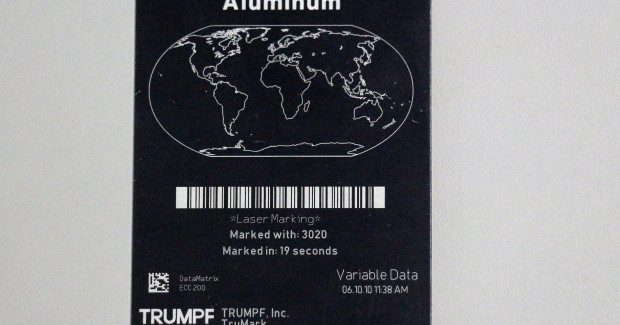
The five main processing modes used in marking are engraving, ablation, annealing, color change, and foaming. Metals, ceramics, and several plastics can be engraved with a laser. The power density of the laser beam is so high during this process that the material partially vaporizes. Ablation is similar to engraving and marks metals and plastics by removing a top layer coating to reveal the underlying substrate. It is most commonly used on anodized aluminum, painted material, for day/night designs, and as a cleaning process to remove particulates after engraving. Metals can also be marked by annealing or tempering the surface of the material. The material is heated just below its melting point to produce structural transformations which become visible as colors based upon the thickness of oxide layers produced.
All grades of steel and titanium are annealable, and colors are stable at temperatures of up to approximately 200 deg C. Color change and foaming are the last two processing modes and mainly used for marking plastics. During a color change the energy of the laser beam is used to selectively alter or destroy the structure of individual molecules or additives, for example the color pigments, without deforming the surface of the material. This is sometimes referred to as carbonization. In foaming, which is only possible in certain plastics, the laser beam melts the plastic locally, causing small gas bubbles to develop. The gas remains trapped as the material cools forming a raised surface. Ambient light is reflected off of these bubbles, causing it to appear lighter.
Once a processing mode is selected, a balance between marking time and quality must be found. The more time allotted, the higher quality the mark. Finding the balance tends to be a difficult challenge, and if the budget allows, one might simply select a higher power laser. Regardless, the best approach is to have samples tested using different lasers with your cycle time requirements and marking specifications. By doing this you are able to learn the capabilities of the different options available and narrow down the selection from there.
DEVELOPING THE PARAMETERS
Every marking process needs a determined power density. When you have chosen the desired processing window you can start optimizing (time, contrast, depth . . .) the mark by changing the energy density. Energy density is the power density in a given amount of time. The longer the power density remains on an area, the higher the energy density. Energy density is dependent on power density, velocity, frequency, and most importantly the overlap of the laser pulses on the surface of the material.
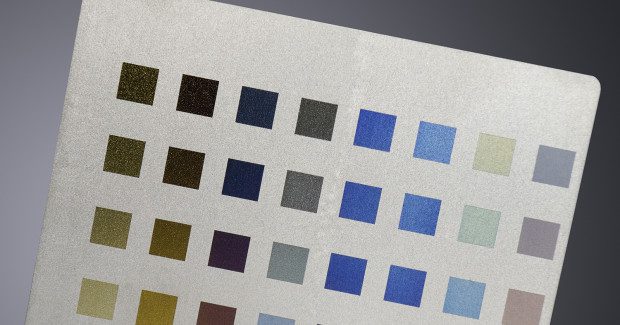
To find the right process or power density, create a test matrix or grid with various laser parameters. The process critical parameters are laser power, pulse frequency, velocity, and focal diameter. Before the gain medium (YAG, YVO4, Fiber, CO2) can emit laser light, energy must be fed into the medium in order to excite it, this process is also referred to as laser pumping. The frequency of the laser is the number of pulses per second. It has a high effect on power density, and also impacts energy density. The velocity (deflection speed) of the laser is defined as the scanning speed of the galvo mirrors, which affects the energy density as well. Another critical parameter is the focus point of the laser head to the surface of the work piece. Marking beyond the focus point increases the focal diameter and decreases the power density. This can be achieved either by manually adjusting the Z-height of the laser’s scanning head, or by using an internal defocusing parameter if your laser marking system has this feature.
The more time you are able to spend experimenting with laser parameters, the more you will learn about how they affect the quality and speed of your mark, but try not to do too much at once. First, find the quality mark you are looking for without noting the cycle time. Once you have a good mark, adjust the parameters at small increments to see how it affects the quality of the mark.
A FINAL PIECE OF ADVICE
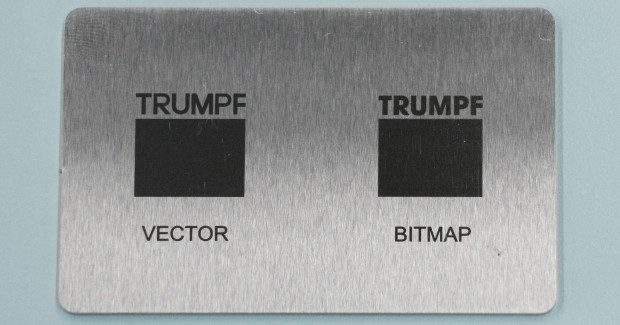
Most laser marking systems can support an imported bitmap image or a vector drawing. A hatched or filled vector drawing will be completed substantially faster than a bitmap image of the same design. This is because when marking a bitmap file, you cannot control the velocity parameter, just the frequency and pulses per pixel. To obtain the same contrast as the vector file for an annealed mark, up to 20 pulses per pixel may need to be used (see Figure 1). The mark time for the annealed bitmap image of the logo is approximately 45 seconds, while the hatched vector file is about 20 seconds. If you are using a bitmap file to mark an image, try filling a vector file instead. It may save you a lot of processing time.
Subscribe to learn the latest in manufacturing.

Industry News