Eliminating Defective Fasteners with 3D Inspection
As lightweight materials sweep the industry, fastener manufacturers have discovered how to overcome the problems of achieving zero defects through 100 percent inspection.
Posted: November 3, 2015
From automotive, trucking, and heavy off-road equipment to aerospace, agriculture, and high-volume appliance/electronics, manufacturers are looking to reduce weight (as well as costs) by turning to lightweight materials like aluminum, plastics, zinc and magnesium. The associated fastening issues related to lightweight applications require zero defects from fastener manufacturers as production speed and quality depend on them.
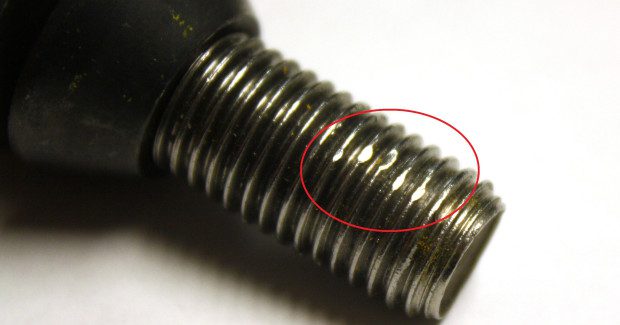
While fastener manufacturers have long relied on conventional methods such as sorting to remove defective parts before they enter production, the fact is that cold heading, moving, and inscribing metal with threads is not entirely predictable. Each piece must be inspected for visual imperfections like burrs, scratches, thread damage or head cracks, up to dimensional measurement that involves thread parameters, lengths, diameters, tapers, radii, straightness, perpendicularity, recess depth, and head protrusion. In high-volume, auto-feed systems with pass-through parts, fasteners require more integrity than ever. To maximize production uptime but maintain critical part safety that prevents potential rework, recall, or liability, manufacturers now expect fasteners to have zero defects, despite the use of lightweight materials on the mating hole/application.
Accordingly, the fastener industry is increasingly relying on higher resolution, 3D inspection of billions of fasteners. Gauging, sorting, and cylindrical part inspection systems that incorporate laser, vision, and eddy current for dimensional measurement and determining metallurgical defects are now used for high-speed inspection of fasteners that range from bolts, screws, studs, and cylindrical parts to nuts, washers, fittings, and bushings.
FASTENING ISSUES WITH LIGHTWEIGHT MATERIALS
While automotive manufacturers have long required zero defects from suppliers, the introduction of lightweight materials, such as aluminum body panels, engines, and manifolds in Ford, GM, Audi, Jaguar and other vehicles, has made this a particular challenge when the fasteners are still made of steel. “With the switch to aluminum bodies, such as in the Ford F-150, you can’t weld like with traditional steel,” says Mike Nygaard, the president of General Inspection, LLC (Davisburg, MI), a developer of high-speed measuring and sorting fastener inspection systems. “Instead, there are billions of self-piercing rivets (SPRs) used, and their dimensions, bore size, and other attributes must be exact with no obstructions. It is critical to ensure not only that steel fasteners don’t damage the aluminum or lightweight material they’re inserted in, but also that they’re flush, fastened properly and not loose.”
According to Nygaard, in high-speed automotive production lines that rely on automatic torquing systems, even a few fasteners that fail to meet dimensional specs out of a million used per hour can cause zero uptime if they jam and require troubleshooting to get production going again. The wrong sized pitch diameters on threads, burrs on the thread, or similar issues can trigger auto-torque failure, stopping thread insertion. Quality control is critical because even small defects can cause big problems in working with lightweight materials, such as having to rework engine blocks if male threaded fasteners strip out of threaded holes. If there is an obstruction in the SPR bore or the dimension is wrong, the rivet may also fall out or not sit flush, which can become a potentially serious, visible quality issue.
ENTER HIGHER RESOLUTION 3D INSPECTION
To address these production and quality issues, the increasing use of lightweight materials is requiring high-speed 100 percent fastener sorting, as well as more inspection capability from fastener sorting machines. “In the past it was permissable to look at a fastener’s silhouette to see if it had a thread or gross thread damage, but now sorting machines need the ability with to find any defect,” notes Nygaard. “Thread damage can be anywhere. And if you’re not looking at it from 360 deg, that burr will get you.”
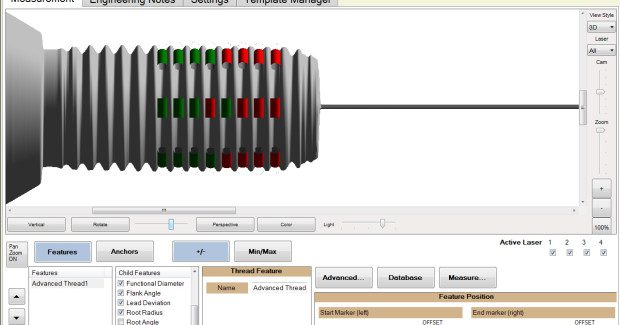
Laser and vision-based machines can provide 100 percent high-speed 3D fastener inspection. Some use 3D information from multiple laser beams to detect defects that may only be on one side of the part, such as damaged threads. Laser topography, in fact, can provide a detailed 3D image of the part by detecting dents, flatness, chips, and dimensional characteristics. Other measuring machines use a series of advanced vision systems to detect defects. Such a multi-view system can provide images from all around the part for greater than 360 deg coverage, plus an ability to measure all dimensions and find visual defects such as cracks, scratches, porosity and laminations.
Some advanced optional sensors can also provide an axial view vision so that the camera can “see” the side of the fastener head or flange to detect cracks or recess defects. In addition, an internal viewer lens can expand the view inside the part, providing complete detail of ID threads for a full 360 deg view of the entire length, to detect very small defects. Eddy current sensors can also detect metallurgical defects, such as in plating or heat treatment, which can help to prevent premature fastener rusting as well as cosmetic defects. This can be vital in safety critical parts such as a wheel bolt, which may be subject to constant vibration or weather exposure.
While the most precise high resolution, fastener inspection machines can measure with as little as 2 microns of total error, typical equipment can be several orders of magnitude less precise. “Eliminating defective parts is all about precision and repeatability,” explains Nygaard, whose company has over 40 patents or patent pending for high-speed measuring and sorting fastener inspection systems. “A typical part today might have 10 dimensions to 30 dimensions checked, all of which ared important to how it assembles and functions,” adds Nygaard. “Any error in measurement increases the odds of falsely failing the part or falsely passing it, either of which is bad for profitability and quality control.”
To minimize error and gain precision in fastener inspection equipment, Nygaard stresses that it is important to ask questions like: How well is the part positioned in the mechanical handling apparatus? How flat is the surface that part riding on? Is there any vibration distorting the image? Is the part aligned with the optics properly? But he emphasizes that the most important question to ask is, “Is the sorting machine National Institute of Standards and Technology (NIST) traceable?”
Since many companies are ISO 17025 accredited, their quality manual requires any gauging system they use to comply with NIST traceability. Calibration and NIST traceability are actually mandatory, even though many fastener companies do not realize this requirement. “A sorting machine is a gauge when you’re using it to check dimensions on a part, but the dirty little secret in the sorting industry is that most machines are not traceable to NIST,” states Nygaard. “That can wreak havoc on your production and quality control because what you think you’re sorting for isn’t really what you’re sorting for. It can be like using a mis-marked 13 in ruler to measure and sort for 12 in parts.”
Nygaard explains how selecting a fastener sorting system with intelligent software is also important in eliminating defective parts. “If the parts aren’t uniform, the algorithm needs enough artificial intelligence to properly place fastener feature start/stop positions,” he says. “To improve lean manufacturing and process control, you want to find and reject only the defects, and then use that data to prevent defects, reduce scrap and variability to increase yield.”
Despite the increased precision of newer high-resolution fastener inspection equipment, they can be as fast as or faster than traditional sorting machines. “Fastener companies can expect to sort about 300 parts per minute to 1,000 parts per minute with the best fastener inspection machines, but with better precision and coverage of the part than typical sorting machines,” says Nygaard. “The machine should be flexible enough to accommodate thousands of different part numbers, but there’s a tradeoff in flexibility and speed.”
While the cost of these fastener inspection systems is higher than traditional sorting machines or cut-rate overseas made equipment, over the course of a typical 5-year to 7-year lifespan the net cost is often just 1/10 a penny or less per fastener in high-volume operations. “If you’re making safety critical, lightweight parts or will be functionally checked by auto-torquing mechanisms, why roll the dice and play Russian roulette with your company’s good name? Would you pay 50 percent less for a life insurance policy that covered everything, with the exception of cancer and heart attack?” asks Nygaard. “Relying on the most precise 3D fastener inspection systems for 100 percent sorting will help ensure that fastener companies remain profitable, top-tier suppliers.”
This article was authored by Del Williams, a technical writer based in Torrance, CA.
General Inspection, LLC, 10585 Enterprise Drive, Davisburg, MI 48350, 248-625-0529, Fax: 248-625-0789, generalinspection.com.


