Measurement & Inspection Showcase
A review of some of the latest gages, instruments and systems used to measure and inspect parts quicker and more accurately.
Posted: April 9, 2015
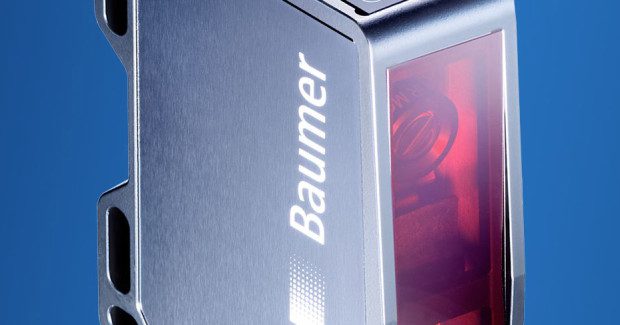
The sensor’s Target design allows easy system integration in an early planning stage using the sensor CAD data. This patented design features ensure exceptionally tight tolerances on beam placement, allowing the design team to rest assured that sensors will operate consistently from one machine to another. Sensor operation is as easy: install, align to the object and select the required language on the touch display – that’s it. PosCon 3D provides the utmost application flexibility. Edge positions are reliably detected even when installed in any non-vertical position with a lateral angle up to 30 deg. The object width is identified within fractions of a second and with an accuracy of 0.02 mm – regardless of the object position within the measuring field.
PosCon 3D can also identify an object’s center position. As soon as the object is outside the acceptable tolerance range, the sensor will trigger a switching output, indicating a failure condition.
Baumer Ltd., 122 Spring Street, Unit C-6, 06489 Southington, CT, 860-621-2121, Fax: 860-628-6280, [email protected], www.baumer.com.
HEAVY-DUTY METROLOGY STAND
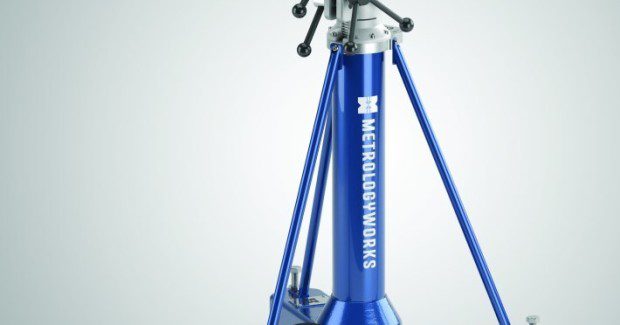
There have been classic stand designs in the marketplace for many years, but the Rhino series heavy-duty rolling metrology stand from MetrologyWorks North America (Buckner, MO) takes the rolling stand design one step further. With an emphasis on rigidity and toughness, engineers have ensured that these stands deliver rock-solid performance when operators need it most. Typical applications for these metrology stands include use with portable measurement arms, laser trackers, optical trackers, theodolites, 3D imagers and scanners and laser projectors.
An industry first is the ability to upgrade a fixed stand to an adjustable moving column without requiring a new main tube. This allows shops to purchase a fixed height stand and upgrade to an adjustable stand in the future if the need arises. “We found that many portable measurement arm customers originally purchase a stand that’s the appropriate height, rarely if ever adjusting it. So, why pay for what you do not need?” said Joel Gorden, the president of MetrologyWorks. Other unique features include an extended double locking column clamp, power-ribbed column casting, a rigidity receiver in the base casting, a foot-pedal lock, an integrated laptop arm mount, a calibration artifact and laser tracker tooling holder locations. There is also an option to bolt on custom accessory plates for more unique applications. Rhino stands are constructed using the latest CNC technology in a number of sizes and configurations, as well as colors.
MetrologyWorks North America, 27208 East 24 Highway, Buckner MO 64016, 816-650-2266, [email protected], www.metrologyworks.com.
NEXT GENERATION WELD CAMERA
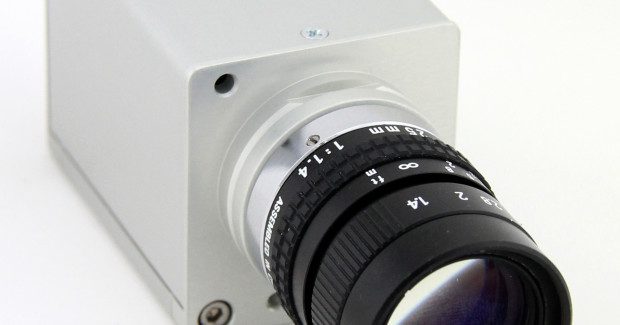
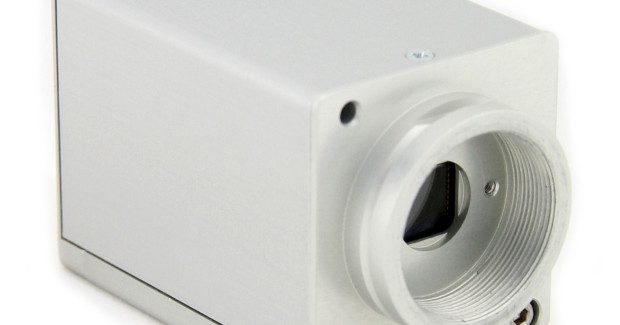
Xiris Automation Inc. (Burlington, ON) offers the XVC-1000 Weld Camera system that includes a 140+ dB high dynamic range capability with power over Ethernet. Complete with a full suite of welding-specific imaging software tools, and a host of unique features this small camera provides unprecedented image quality of a variety of welding and laser processes. The XVC-1000 comes packaged with functionality designed to maximize image quality and reliability, including image triggering, general purpose I/O, imaging window capability and a weld arc photodetector. Weighing 135g without optics, the system is easily integrated and highly effective. With this impressive system Xiris has also released the Xiris WeldStudio Viewer that allows for unique customization of automation systems and easy integration.
Xiris Automation Inc., 1016 Sutton Drive, Unit C5, Burlington, ON L7L 6B8, 905-331-6660 x238, Fax: 905-331-6661, www.xiris.com.
HANDS-FREE UV-A LED LIGHT SOURCE FOR YOKE INSPECTION
Spectronics Corporation (Westbury, NY) offers the EK-3000 EagleEye™ UV-A/White Light LED Inspection Kit that is ideal for magnetic particle inspection. It enables NDT inspectors to easily detect fluorescent flaws in ferrous materials. This portable kit features the compact, battery-operated EagleEye inspection lamp. It has two ultra-high intensity UV-A (365 nm) LEDs for NDT inspection, plus a three-LED white light assembly for visible illumination in dark work areas.
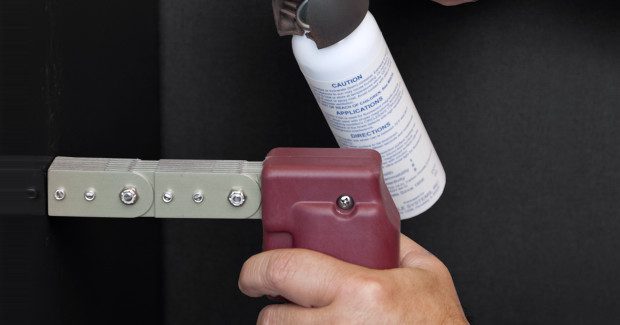
An adjustable strap enables the EagleEye lamp to be worn on a hard hat or directly on the head for hands-free operation. An attachment is also available that permits the lamp and sprayer to be mounted together for single-handed fluorescent yoke inspection. As a result, inspections will go quickly and efficiently without the use of an additional hand. Spray and inspect in one simple step! The kit also comes with a lanyard, two replacement splash guards with integral particulate filters, three spare batteries, a battery charging cradle with AC and DC cords sets, and UV-absorbing spectacles. All components are packed in a soft carrying case.
Spectronics Corporation, 956 Brush Hollow Road, PO Box 483, Westbury, NY 11590, 516-333-4840, Fax: 516-333-4859, [email protected], www.spectroline.com.
WIRELESS MEASUREMENT OF ROTARY TABLE, LATHE, SPINDLE, 4- & 5-AXIS MACHINE TOOL ACCURACY
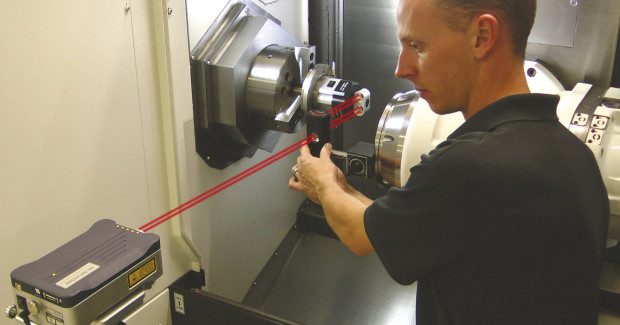
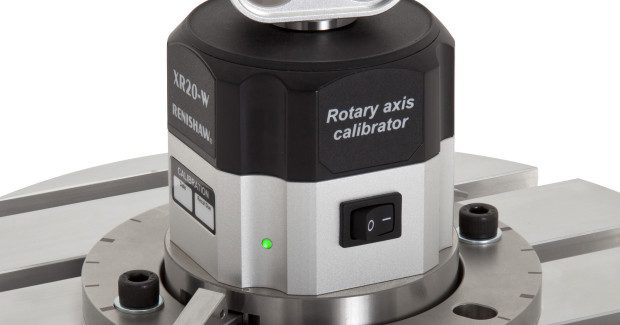
The XR20-W calibration system from Renishaw Inc. (Hoffman Estates, IL) wirelessly measures the angular position of rotary axes to within ±1 arc second for testing the accuracy of lathes, multi-axis machine tools, mill-turn machines, trunnion tables and spindles. The XR20-W works in conjunction with XL-80 or ML10 laser interferometers, as the system combines the readings of the rotary calibrator and laser to determine positioning errors in axes under test.
https://youtu.be/f-IKnHSOwb4
The rotary axis calibrator is generating positive feedback from the field with its advanced, compact design allowing easier set-up and use. Application flexibility is extended by the addition of new off-axis rotary software that allows the XR20-W to be used even when it cannot be positioned directly on the rotary axis under test. The software calculates true position and records axis performance and errors when compared to the intended target. The test takes about ten minutes and results are sent to a PC via Bluetooth® connection. Users say they can now test more and different machine tools than previously possible, giving a better return on investment and offering a more attractive service to their customers.
“The XR20-W rotary axis calibrator has transformed the way we calibrate rotary axes on machine tools,” said Tony Morley, the president Morley Machine Tool Alignment (Milton, WA), a service and maintenance provider. “Before XR20-W, our technicians relied on the old RX10 and our in-house designed “Morleyometer” for applications where the calibrator could not be mounted on the center of rotation. While these devices got the job done, they were heavy, cumbersome and slow. Set-up could be challenging, and the associated cables and fixturing meant that great care had to be taken to ensure the test proceeded smoothly. Set-up is now quick and easy and the new RotaryXL software is a pleasure to use.
“The XR20-W can even be used in ‘off center’ applications such as trunnions and head type 5-axis machines,” added Morley. “The new methodology allows mechanical set-ups to be done quickly with just a simple generic mounting fixture, allowing a fully automatic test routine to proceed without delay. This tool has enabled us to offer our customers (typically high end aerospace component manufacturers) an exceptionally high standard of service and helped our company grow from just four employees a few years ago to the 20 strong team we have today.”
The XR20-W’s lightweight – just over two pounds – and wireless operation allow fast setup and eliminate safety hazards created by cables. It attaches to a rotary axis via a flexible mounting ring assembly, and is centered within ±1 mm (0.04 in) using a visual aid. Flexible mounting options include an adapter plate for rotary tables with unsuitable center recesses and a chuck adapter for lathes. The various mounting options ensure faster set-up and minimize alignment errors that can lead to measurement errors.
“We have reduced our test setup time by 40 percent and test run time by 20 percent,” noted Luke Wang, assistant general manager of the quality control department for Hurco, Taiwan. “And the Bluetooth wireless technology allows safer testing, making supervision a non-issue. As a result we do not disrupt shop floor activity, a great boost to our operations and quality procedures.”
Renishaw, Inc. , 5277 Trillium Boulevard, Hoffman Estates, IL 60192, 847-286-9953, Fax: 847-286-9974, [email protected], www.renishaw.com.


