Replacing Tactile Probing with Laser Scanners
This technical assessment explains how the new inspection methods for diagnostic measurement of sheet metal components and body-in-white assemblies at this Turkish automotive manufacturer involves cross scanners being used on coordinate measuring machines.
Posted: September 9, 2014
“We require 0.2 mm uncertainty on a 5.5 m diagonal and, as the inspection device has to resolve to one-tenth of the tolerance band, the scanners need to measure down to 20 microns. Measurements have proven that the scanners achieve this requirement in line with their listed specifications.”
Turkish automotive manufacturer FIAT-Tofaş (Istanbul, Turkey) is implementing new inspection methodologies for their diagnostic measurements of sheet metal components and body-in-white (BIW) assemblies. A key element involves the installation of XC65Dx-LS Cross Scanners and CAMIO multi-sensor metrology software from Nikon Metrology, Inc. (Brighton, MI) that are retrofitted on an existing Hexagon double-arm coordinate measuring machine (CMM) at their Bursa manufacturing plant.
Inspection is now twice as fast compared to touch probes and provides better insight, reducing the time needed to diagnose problems and raising efficiency.
Founded in 1968, TOFAŞ (Türk Otomobil Fabrikası A.Ş.) manufactures cars, taxis and vans in Turkey and sells them internationally. Employing over 6,000 people, the company is one of the top two automotive manufacturers in the region, with a production capacity of 400,000 units per year at its factory in Bursa. Products are offered under several brands including Fiat (which jointly owns the company), Peugeot, Citroen and Opel. The Tofaş-built Fiat Linea is Turkey’s best-selling passenger car, while its Fiat Doblò (also produced as Opel Combo) claims first place in the light commercial vehicle category.
CROSS SCANNING WITH CMMS
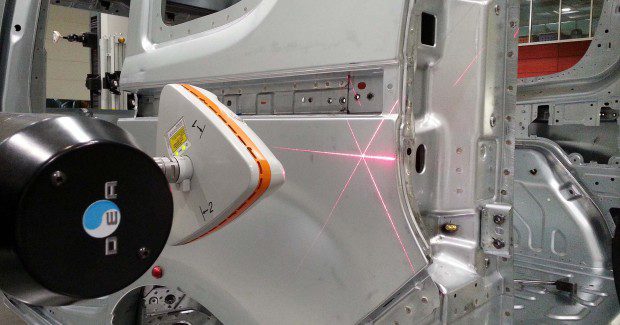
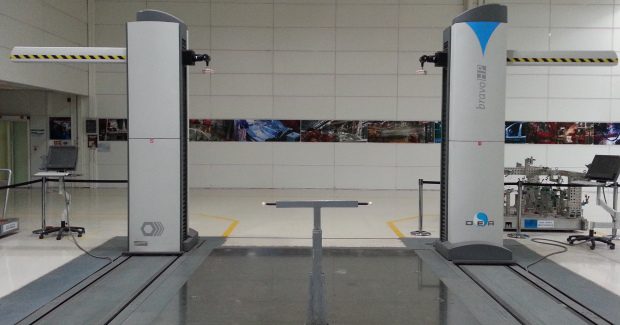
Since 2013, the cross scanners have been installed on two Hexagon DEA BRAVO horizontal arm coordinate measuring machines (CMMs) that are equipped with a continuous wrist CW43 interface. Incorporating three lasers in a cross pattern, the XC65Dx-LS captures full 3D details of features and surfaces in a single scan. By digitizing complex features from three sides, the cross scanner acquires the complete 3D geometry of the features, driving the accurate extraction of positions and dimensions.
An overview and demonstration of the XC65Dx laser scanner.
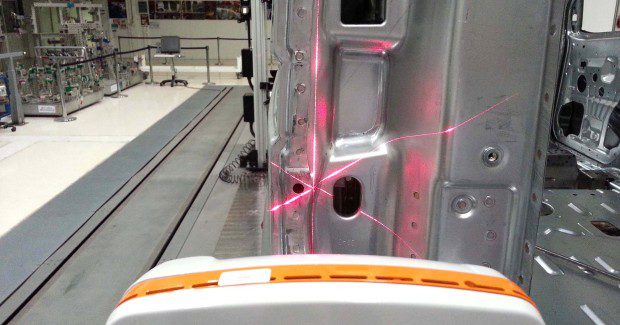
Smart laser intensity adaptation allows any surface, such as those with varying color or high reflectivity, to be scanned without the use of a matt spray or other user interaction. This is enabled by automatic, real-time adjustment of sensor settings between successive laser stripes and for each individual point along the laser stripe. The XC65Dx-LS installed at Tofaş has a longer stand-off distance and offers distinct advantages. By capturing geometry from up to 170 mm away, the scanner gains optimum access to BIW structures and can scan over the clamps that hold components in position.
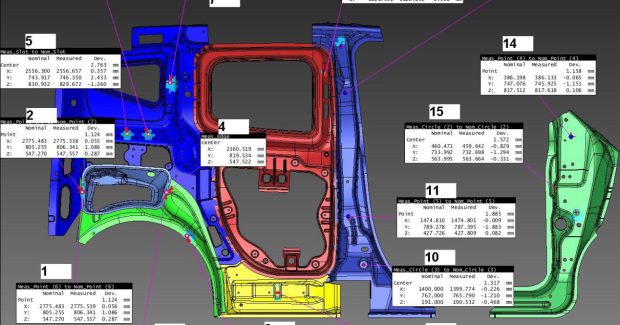
The scanners can be used in combination with tactile probes for alignment of a part or for a mixed measuring routine. DMIS-based CAMIO8 software provides a rich programming environment, with intuitive software tools for both tactile and laser scanning applications. A wide variety of inspection tools is available including full part-to-CAD comparison, intelligent feature extraction with GD&T tolerancing and profile analysis. CAMIO is optimized for processing large point clouds, making it perfectly suited to measuring sheet metal panels and assembled car bodies.
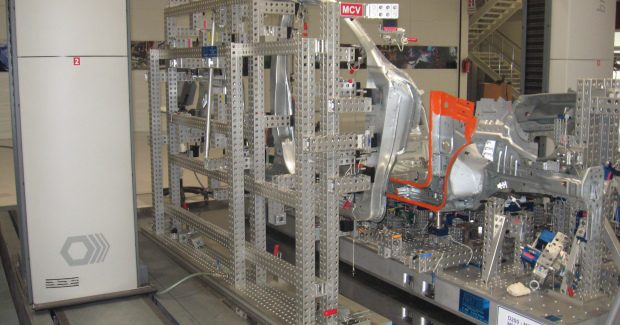
During vehicle development, the scanners are used instead of touch probes for inspecting both individual car panels as well as for complete diagnosis of the BIW, after the car’s sheet metal panels have been welded together but before the bonnet, doors and boot lid have been added. In this way, the vehicle’s entire sheet metal structure is inspected to very close tolerances, showing the interaction between the panels and allowing parts issues to be separated from process issues. Also completed vehicles are inspected, mainly for gap and flush spacing between different car panels.
LASER SCANNING-BASED INSPECTION
Özgür Ogur in the quality department at Bursa commented, “The savings are significant when using scanners instead of tactile probes for feature and surface inspection of BIW on our CMM. Laser scanning fulfills our accuracy requirements and there are no significant differences in accuracy between tactile and scanning,” he continued. “We require 0.2 mm uncertainty on a 5.5 m diagonal and as the inspection device has to resolve to one-tenth of the tolerance band, the scanners need to measure down to 20 microns. Measurements have proven that the scanners achieve this requirement in line with their listed specifications.”
“These laser scanners are much better than other types we have used,” added Ogur. “Their repeatability down to one micron is really excellent and beyond our expectations. Inspection is now twice as fast as when we used touch probes, reducing lead-time between design iterations and raising efficiency.”
Diagnostic measurement of anything from individual components to finished vehicles is carried out on the horizontal arm CMM using the laser scanning heads, which check for gap and flush as well as inspecting features and surfaces. The equipment is used continuously over two shifts every day and it is rare to find touch probes on the end of the two arms. The data generated by the scanners gives full geometrical detail by fully digitising the parts. The large amount of part-to-CAD comparison information provides greater insight when analysing the inspection results, ultimately leading to faster decision making.
Scanning on the CMM has eliminated the need for dedicated, stand-alone measurement systems and supersedes the use of laser scanners on portable measuring arms. Compared with dual horizontal arms scanning, which would require two operators to measure both sides of a car, the CMM measures automatically and is inherently more accurate and repeatable. With portable scanning, an operator needs to be told which features to inspect, whereas on a CMM it is simply necessary to call up a program from a library and start the cycle.
Further advantages of scanning are that it greatly broadens the application scope of horizontal-arm CMMs, allowing better use to be made of the capital investment. Moreover, the controlled, process oriented measurements are ideal for SPC. The technology leads to faster detection of problems and more prompt corrective actions, as well as greater flexibility and economy in the quality control laboratory due to the ability to run inspection cycles unattended for long periods.
VIRTUAL ASSEMBLY REDUCES PROTOTYPE PROCESS
In such a dynamic production facility, the company needs a modern quality control function to support the development phase of new vehicle models. All body parts constantly undergo comprehensive checks, but the individual pieces of data collected do not show how well adjacent parts fit together. It is therefore necessary to assemble mating panels on high precision fixtures, called meisterbocks that replicate the body shop’s assembly tooling and process. In this way, design, fit, function, gaps and flushness of sheet metal elements can be visually assessed and measured dimensions can be compared with the CAD model of the car.
The ultimate goal of Tofaş is moving towards a situation where it will scan completely all prototype sheet metal panels and parts and create a virtual assembly using the 3D digital copies for geometry evaluation in software. This new geometric verification approach is already revealing potential part fitting issues and aims to reduce the duration of individual prototype cycles as well as the number of prototype iterations needed to produce different car panels, saving time and cost. The 3D measurement data of initial prototype parts will also serve as a reference to analyse dimensional changes during serial production.
Fiat is leading the study project and deployment is expected in one to two years.
COMPARATIVE ISO 10360 ACCURACY TESTS
None of the above would be possible if the laser scanners were not able to capture the BIW data sufficiently accurately and repeatably. So Tofaş engineers Ogur, the diagnosis measurement lab leader, and Rahim Koşar, the aesthetics diagnosis expert, went to considerable lengths to test the performance of the XC65Dx-LS against the traditional touch probe.
Comparative benchmarks were performed in accordance with ISO 10360 acceptance and re-verification tests for CMMs and three criteria were investigated – probing error (MPEP), length measurement error (MPEE) and tactile scanning error (MPETHP).
In the worst case, MPEP was 7 microns after five scans on a ceramic sphere and in one of the zones, 1 micron error was recorded. The catalogue value was given as 15 microns, so all results were acceptable. Five MPEE measurements of a ball bar in seven diagonal positions yielded sigma values under 7 microns. As scanning is done from different angles, the 25 mm sphere needs to be measured at five angular positions. Deviation was found to be 11 microns, within the 12 microns stated in the catalogue. All three error values were at least equivalent to those achieved with tactile probing.
SUCCESSFUL BENCHMARKS ON REAL PARTS
The Tofaş team took the trials a step further to reality by laser scanning actual car parts. A Doblò side panel was selected and its contours and geometrical features were inspected first by touch probing and then by laser scanning. The former measurements were taken as the nominal and the latter values used to calculate the difference.
This again showed that laser scanning is an acceptable procedure for quality control of BIW vehicles where as an example a tolerance bands of < ±0.2 mm is required for surface measurement. Spheres were then attached to an assembled Doblò car to review diagonal length scanning accuracy. An uncertainty of 0.2 mm was observed over a length of 5.5 m, so scanning is considered acceptable for diagnostic measurements on a CMM with 45µm + 25L / 1000 uncertainty.
Nikon Metrology, Inc.,12701 Grand River Avenue Brighton, MI 48116, 810-494-5616, [email protected], www.nikonmetrology.com.


