Laser Encoders Deliver Part-Per-Million Accuracy in Composite Machining
Laser encoders from Renishaw deliver part-per-million accuracy during week-long machining cycles on 40 meter long composite wing skins being built by Flow Corporation.
Posted: April 29, 2014
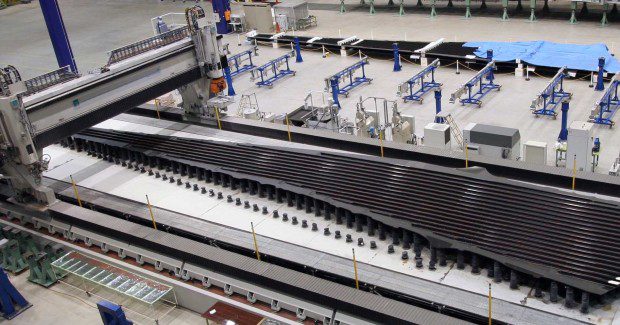
The Composites Machining Center (CMC) from Flow International Corporation (Kent, WA) hits the mark for single-setup processing of 40 m long composite wing skins, and one of the keys to holding long-axis accuracy during week-long machining cycles is the HS10/HS20 laser encoder from Renishaw Inc. (Hoffman Estates, IL). With the precision of a laser interferometer, the encoder and its companion RCU10 real-time compensation unit, deliver part-per-million positioning accuracy on the CMC’s X-axis, eliminating variables that had to be compensated for when using a physical scale attached to the machine.
The CMC is one of the new machine tools developed to meet the aerospace industry’s need to produce large monolithic parts with minimal dimensional variation. “Reduced variation in parts is an industry wide goal,” explains Mark Saberton, Flow’s director of aerospace. “The objective is reduced assembly time, effort and tooling. The OEMs want to eliminate assembly shimming, which adds weight to the product and time to the process. They want parts to meet tolerances when they arrive on the assembly floor, rather than using fixtures and shims to bring parts into assembly tolerance. Weight is also an issue. Less variance on a plane’s parts ensures better control of the aircraft’s final weight.”
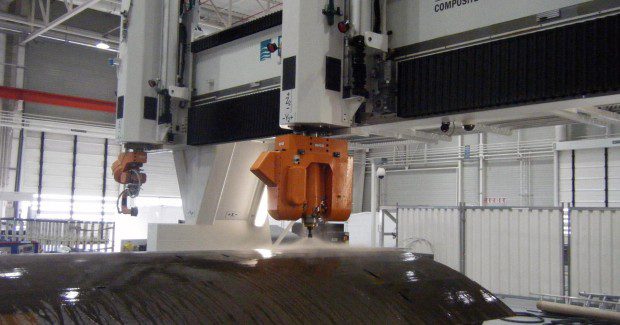
Flow’s CMC was created as a one-stop processing center for composite parts that have been autoclaved. It can be configured as a mid-rail gantry or dual travelling column machine. The gantry design carries two rams on a single gantry with a 5-axis wrist on each ram, one for ultra high pressure waterjet cutting and one for conventional high-speed routing. The CMC can do all the finish machining on a wing skin: trimming, drilling, routing, surface milling, marking and inspection – in one setup, and parts leave the machine ready for assembly. The machines are widely used by Airbus partners around the world.
The modular CMC is available in standard X-axis lengths of 6 m to 50 m, as well as custom sizes. “We had always used tape scales on the X axes, but a physical scale 30 m to 50 m long, attached to the machine, introduces structural issues and makes thermal compensation much more difficult,” explains Todd Fuchs, a senior electrical project engineer at Flow. “The temperature differences the machine sees over a 40 m length during a 130-hour machining cycle can be relatively extreme, even in an air conditioned plant. Between changes in the scale itself and the substrate of the machine, the variables become too complex. The HS20 laser encoder is the easiest way to obtain accurate feedback on such a long axis.”
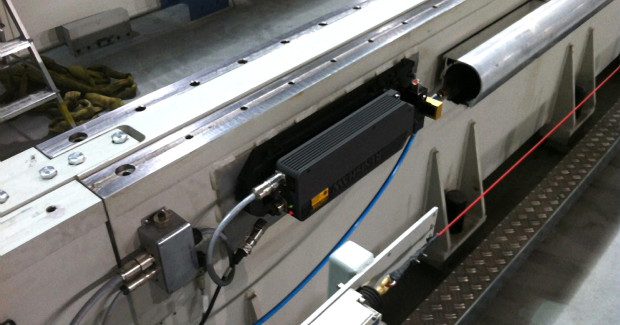
With a rack and pinion drive on each side of its gantry, the CMC uses split X-axis feedback with a laser on each side, working as a master and slave for positioning. The lasers are located under the way cover bellows near the drivetrain, in a duct purged with clean, dry air, ensuring stable measurements and protection from airborne debris which might “break” a laser beam.
Flow has used an HS10 laser encoder, as well as the current HS20 model, on a total of 24 machine axes. Installations have been carried out in Germany, Spain, France and UK with support from Renishaw engineers. Both encoders use the same laser interferometry technology used for linear measurement and error compensation by machine calibration specialists, except the laser encoders are designed to be a permanent scale on the machine, replacing glass/tape scales and resolvers.
Unlike a tape or glass scale, the laser encoder system has no short term errors which can “stack up” on long axes, and its 1 m/sec measuring speed accommodates today’s fast-moving machine tools. The HS20 is sealed to IP43 and hard anodized to provide all round protection in harsh machining environments. “Our X-axis repeatability spec for a 40 m gantry is 0.0381 mm (0.0015 in), essentially equal to the laser interferometer used to calibrate the machine,” said Fuchs. “The laser also provides twice the resolution of a tape scale, though a machine of this size and type is unable to make use of it.”
PART PROBING CRUCIAL FOR SETUP AND POST-PROCESS MEASUREMENT
X-axis positioning precision is also a factor during part probing, which is vital to the cutting process. The CMC uses an RMP60 touch probe for locating the part during setup and confirming finished dimensions after machining. “Some of these parts, such as wing skins, are worth nearly $1 million before machining,” Fuchs stresses. “When they come to the machine, they are seldom a match to the CAD model, so we probe extensively and do a lot of best fit calculations prior to machining.”
The touch probe’s compact design allows it to access and measure any point on the part that the machine head can reach. Its frequency hopping spread spectrum (FHSS) radio signal transmission allows multiple probe systems and other industrial equipment to coexist in “noisy” industrial environments, particularly as wireless Wi-Fi and Bluetooth communications proliferate.
“We have laser equipped machines in many European countries already, and the HS20 laser encoder has proven easier to deploy than tape scales, as well as reliable and robust,” Fuchs adds. “For these long axes, where machines are cutting expensive and critical parts, customers appreciate X-axis positioning that’s as accurate as the gold standard of linear measurement, the laser interferometer.”
LASER ENCODER BACKGROUND
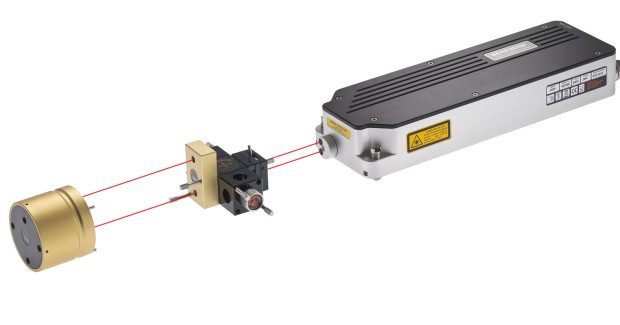
Used with a long range optics kit and RCU10 real-time quadrature compensation system, the HS20 laser forms a non-contact, interferometric-based encoder system for high accuracy (1 µm/m) linear position feedback on axes up to 60 m. It works with any CNC that can read A quad B signals in RS-422 digital format.
The RCU10 can monitor the machine tool bed, the part, and the machine’s ambient (air) environment with various sensors. The RCU10 can compensate for the refractive index of air (which affects light transmission), using air pressure and temperature sensors; and thermal expansion of the machine structure and/or workpiece using material temperature sensors. It uses advanced algorithms to perform real-time compensation, adjusting the encoder count from the laser head, based on the sensor data. A single RCU can support up to eight sensors when paired with a sensor distribution box, or 32 in a multi-axis system.
HS10 and HS20 systems have been in use for over 15 years with many of the world’s leading aerospace companies. The high strength and reduced weight of composite materials and the ability to form very accurate shapes has clear advantages compared to conventional aluminum structures. These include a reduction in fuel consumption through lower weight and reduced maintenance due to reduced need for corrosion checks in service. Over the last 20 years the percentage by weight of a conventional aircraft replaced by composite material components has risen with each successive generation of aircraft design.
However, conventional machining of composite materials poses problems due to the combination of ultra-stiff fibers with relatively weak matrices, with the potential for delamination and damage caused by the intense heat arising from conventional processes. Abrasive waterjet cutting eliminates these problems and Flow International is a world leader in developing the technology and machines to take advantage of this process.
www.flowcorp.com, www.renishaw.com


