Measure Not Once, Not Twice . . . But Many Times
Many sensors are often needed to measure certain dimensions, such as the flatness of a large surface, the taper of a long part, or large complex parts found in automobile and aerospace manufacturing. Here are two new systems to help shops expand their capabilities in multipoint inspection.
Posted: January 24, 2014
A REVOLUTION IN MULTIPOINT GAUGING
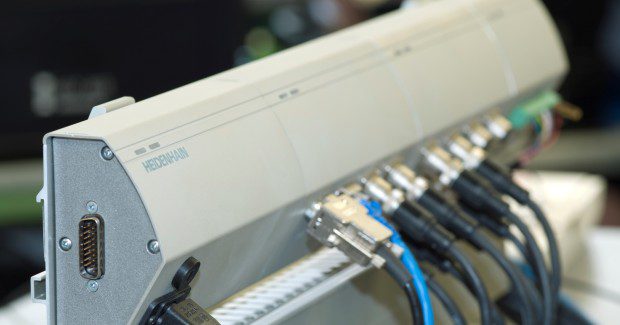
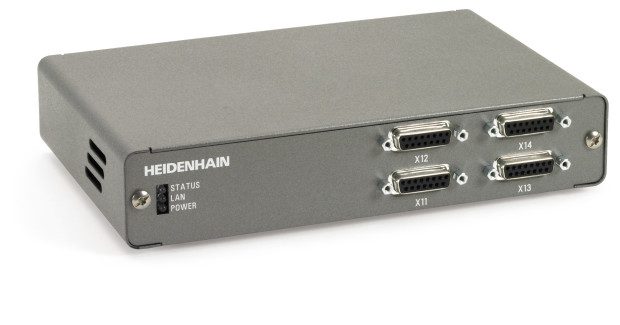
The new MSE 1000 modular multiplexor from Heidenhain Corporation (Schaumburg, IL) brings revolutionary multi-channel electronics to metrology applications, allowing for the connection of many different sensors and the acquisition of measured values via Ethernet. Over 250 devices can be connected, especially useful in production line measurement systems.
Oftentimes, many sensors are needed to measure certain dimensions, such as the flatness of a large surface or the taper of a long part. Large complex parts such as those found in automobile and aerospace manufacturing require large amounts of different sensors to fully qualify. The MSE 1000 provides the hardware base to combine up to 250 sensors of varying types to satisfy today’s measurement needs (see Figures 1-2).
A demonstration and overview of the the MSE 1000 modular multiplexer that brings multi-channel metrology to a lot of different applications, including production line type measurement systems. You can connect a host of different sensors to the MSE 1000 and acquire measured values via Ethernet, up to 250 channels. It’s basic configuration is this: It consists of a power module and a basic communication module with additional modules available for connecting to linear or rotary encoders, LVDTs, analog inputs, as well as I/O modules and compressed air modules. All the modules mount on standard DIN rails.
The software package included with the MSE, MSEsetup, allows a shop to configure and master all the connected channels. MSEsetup also has graphical diagnostics of connected sensors and MSE modules and allows for data transfer to a PC, and the writing of measured values directly to an Excel table. Additionally, the driver is included to allow a user to create their own customized software.
Heidenhain Corporation, 333 E. State Parkway, Schaumburg, IL 60173, 847-895-0945, [email protected], www.heidenhain.us.
FREE MULTIPOINT SOFTWARE FOR MULTIPOINT INSPECTIONS
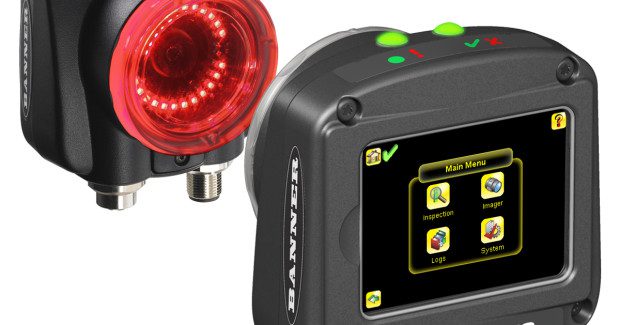
Banner Engineering Corporation (Minneapolis, MN) has released a free firmware update for the company’s industry-recognized iVu Plus TG. The easy-to-install iVu Plus TG Multipoint Software enables the simultaneous use of several match, area and/or blemish sensors across various regions of interest in a single inspection and enhances the sensors’ reliability and accuracy. If the sensor identifies an incorrect or missing object when conducting an inspection, the software recognizes it and alerts operators as to where the problem occurred. With the ability to monitor multiple inspections at once, users are able to streamline operations, while ensuring a precise inspection (see Figure 3).
This tutorial video provides an overview of the iVu Plus TG display and provides instructions regarding the user interface.
“With multipoint inspections, the iVu Plus TG sensor can simultaneously check multiple features on a part while segregating diverse information, such as identifying the failure type and where the failure occurred,” said Brad Ragozzino, the vision marketing manager of Banner Engineering. “This allows shops to maintain efficiency on their manufacturing line by pinpointing what is causing the failure and quickly fixing the problem.”
To tackle diverse inspections, the iVu Plus TG can be configured to operate using four different sensor types. These types include Area, which verifies the presence of a feature or features of interest; Blemish, which identifies flaws on a part, such as scratches on a disc; Match, which verifies that a pattern, shape or part in any orientation matches a reference pattern; and Sort, which recognizes and sorts as many as 10 different patterns of parts, such as nuts, bolts and washers. The iVu Plus TG sensors also feature easy operation and installation, allowing users to set them up in a manner of minutes.
Banner Engineering Corporation, 9714 Tenth Avenue North, Minneapolis, MN 55441, 888-373-6767, Fax: 763-544-3213, [email protected], www.bannerengineering.com/buyonline.


