As The World Turns
A process-controlled hard turning cell in this Texas machine shop deploys programmable gages for measuring and sorting mud-motor bearings – and the cell pays for itself in 18 days.
Posted: October 31, 2013
PROCESS CONTROL TOOLS AND SOFTWARE
The Equator is a low-cost, flexible alternative to dedicated gaging. It uses the comparison method of measuring. A master part with known measurements taken on a CMM is used to “master” the Equator, with all subsequent measurements compared to the master. Repeatability is 0.00007 in (0.002 mm) immediately after mastering.
To compensate for shop temperature changes, the Equator can be re-mastered at any time. The Equator uses an SP25 probe for touch and scanning data collection, at speeds of up to 1000 points per second. Styli are stored in an integral six-port changing rack, and the system is programmed through MODUS™ Equator software. The Equator can be used manually with push-button ease, but its EZ-IO software for automation also makes it ideal for integration into cells like Conroe’s.
“We attended an open house at Hartwig in early 2012 and saw the Equator in action, along with Okuma’s twin-spindle dual-gantry lathe,” notes Wardell. “Apart from being automation ready for parts of our type, the lathe’s Windows®-based OSP dual-path control has an open-architecture, PC-based operating platform, which was important in our plan for developing our own auto-compensation software.”
GAGING AS PART OF THE AUTOMATED CELL
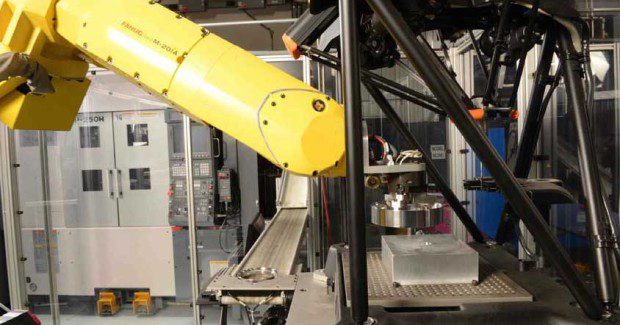
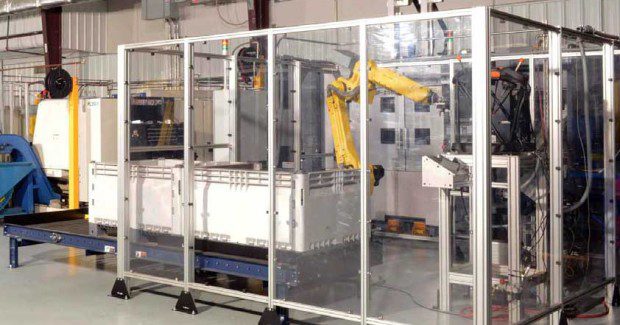
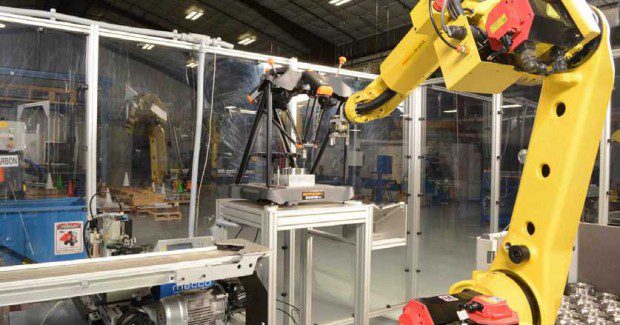
Wardell and Buck went on to install a cell consisting of the Okuma 2SP-250H, a single Equator, an engraving machine, and a Fanuc M20iA 6-axis robot. In practice, the lathe’s two part carousels are loaded with raw workpieces, approximately 300 parts. The lathe’s dual gantry loaders feed the spindles and place finished parts on a chute leading to a conveyor for pickup by the robot. The robot places the part on the Equator for measurement and if acceptable, transfers it to the engraving machine, and finally boxes/palletizes the finished parts.
“We developed our own tool compensation software to run on the OSP control,” Wardell adds. “This software uses measuring results from the Equator, transmitted in the form of a CSV file, to offset the tools when the part deviates from tolerance.” Machining removes about 0.015 in (0.38 mm) from each side of the part, with the tightest tolerance at ±0.001 in (0.025 mm) and an 8 microinch (0.5 micron) surface finish. Parts range in size from about three to six inches O.D.
“The Equator is easily able to measure within our tolerances with a high margin,” says Wardell. “Our OD/ID stays spot on, with perhaps a couple of tenths variation on radius. We batch-process parts by size, so changeovers of chuck jaws and other tooling are minimized. The Equator’s speed allows it to easily keep pace with the process. We re-master only once a day, because our shop is climate controlled to 72 deg F (22.2 deg C).”
INSPECTION PRINCIPLES AND AUTOMATED FLEXIBILITY
The measuring methodology for the parts is surprisingly simple. “We made an aluminum block with a hole in the center which is placed in the center of the Equator fixture plate,” Wardell explains. “We use this to determine our center and set our coordinate system. Each part is placed in the center of that block. We touch to get a center on the part, then surface scan for everything else. We planned the measurement process to work without a part fixture or stylus changing. The robot chooses, through the Equator’s EZ-IO software, which measuring program to run for each type of part. We know the critical features we must measure to ensure the part is within tolerance.”
MEASURING/SORTING USED PARTS
The hard turning cell currently produces about 600-700 finished parts per day, and it led to a follow-up project involving a parts sorting cell for a customer. Based on a concept sketched out by Touchette, Wardell and Buck are developing a measurement and sorting cell for used mud-motor thrust bearing races.
In oil field service shops, used motors are disassembled, refurbished and put back into service. “The customer was visually inspecting used races to determine if the parts were reusable, and they knew they were throwing away some good parts – and money,” states Wardell. “We wanted to give them a plug-and-play measurement and sorting system that takes human judgment out of the process, so more good races can be salvaged.”
Still in development when this article was written, Buck and Wardell are assembling a cell that consists of two Equators, a Fanuc LRMate 200iC 6-axis robot, multiple lanes of low-profile conveyor, a Fanuc iR Vision system and an ATI quick toolchanger for the robot’s end-effectors. The vision system tells the Equator what part number is being presented and what measurement program to run. Good parts are subsequently placed on the appropriate conveyor, and bad parts are placed on a scrap conveyor.
“We designed this system to be trucked in for delivery as a unit, and user friendly for the motor shop people – just turn on the power and load parts onto the conveyor,” Buck says.
“For our machining cell, there was no other cost-effective, shop-floor measuring tool comparable to the Equator,” Wardell adds. “And we hope that our venture into cell integration for a customer opens a new business avenue in this area for our entire company.”
Conroe Machine, LLC, 701 Conroe Park North Drive, Conroe, TX 77303, 936-494-2566, Fax: 936-494-2568, www.conroemachine.com.
Renishaw Inc., 5277 Trillium Boulevard, Hoffman Estates, IL 60192, 847-286-9953, Fax: 847-286-9974, [email protected], www.renishaw.com.


